Keen owners of the Malahit SDR radio will want to update the firmware to get the latest features, so this short guide will help them. First, the latest version should be downloaded and unzipped. The files are kept here: Malahit DS2 Firmware Downloads. I downloaded version 2.10F. These instructions are largely based on Manuel’s fine resource for the Malahit DSP2.
Step 1. DFU Mode
You need to get the radio in DFU Mode, which enables you to perform the update. Get the antenna out of the way, e.g. remove or fold it. Then perform these steps:
- Switch off the radio.
- Lie the radio flat on its back.
- Push the two buttons (Volume and Tuning) at the same time and hold then down until step 5.
- Push in the power button on the side and hold it in.
- Release the two buttons.
- Release the power button.
- When the LED at the side of the radio is blinking green and red, it is in DFU mode.
If you cannot get the LED blinking red and green, do this sequence faster, else it don´t work.
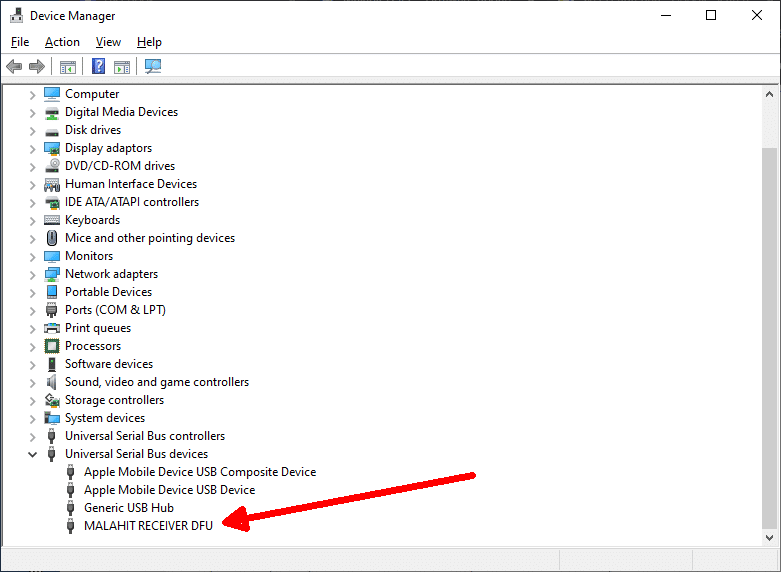
Once the radio is in DFU mode, you can plug in a USB data cable between the Malahit DSP2 and your computer. In Windows 10 Device Manager, you should see it when you expand Universal Serial Bus devices:
Step 2. Start STM32CubeProgrammer
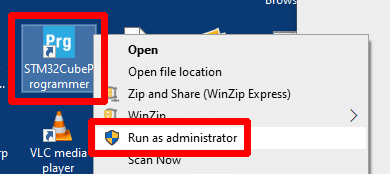
You need the free STM32CubeProgrammer program from STM. Download it and install it. Run it in Administrator mode (right-click its icon and you will see the option).
Step 3. Connect Malahit DSP2 to Computer
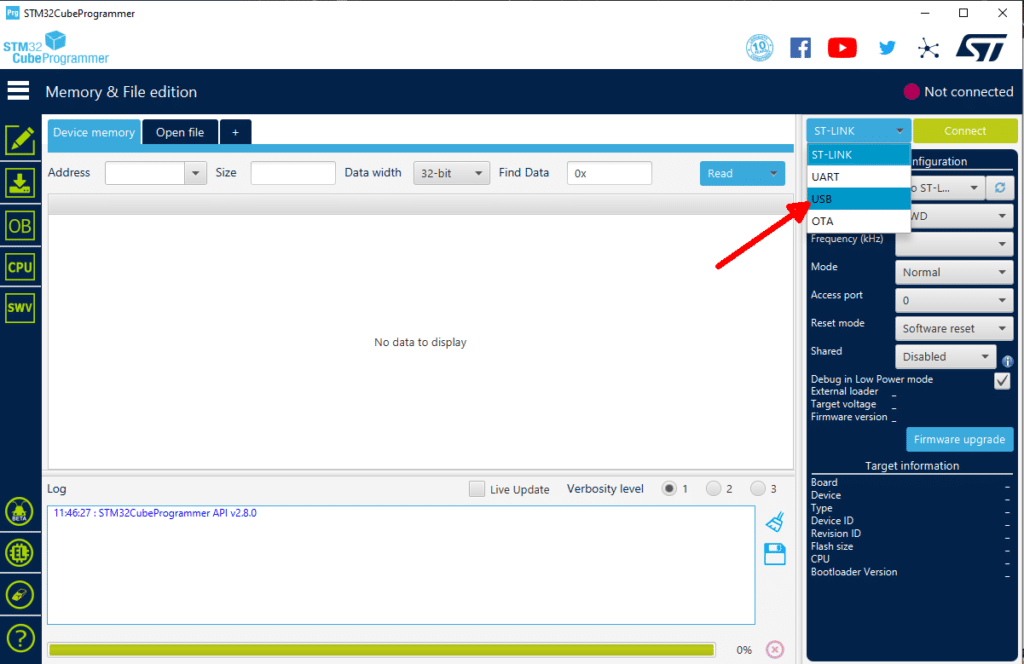
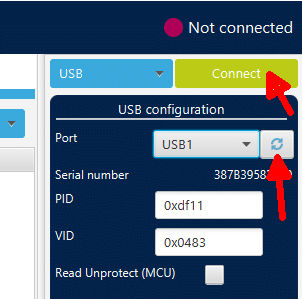
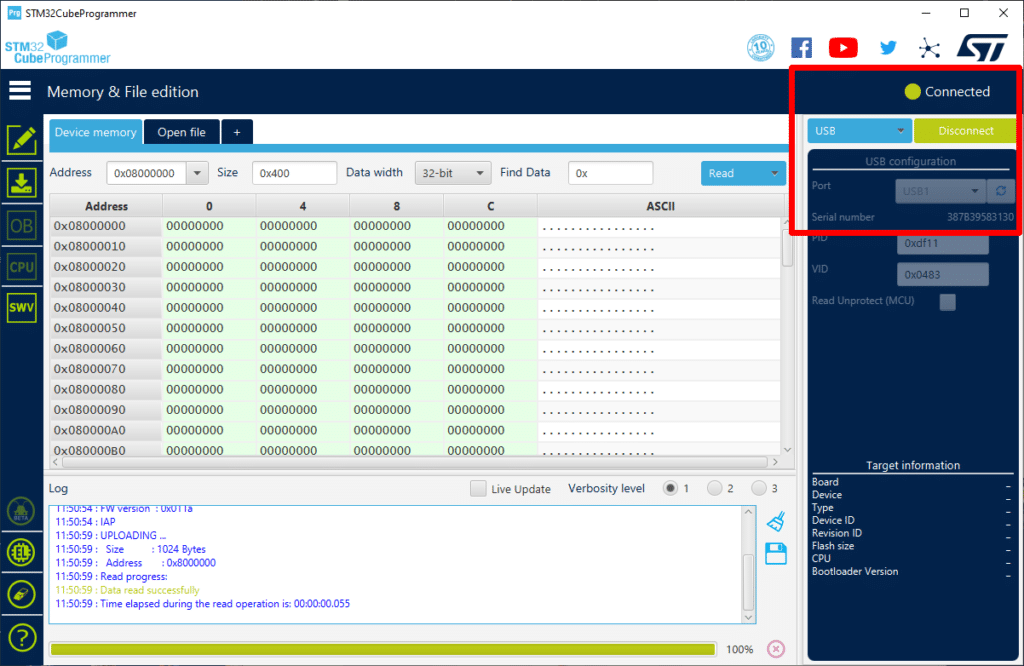
At the top right in STM32CubeProgrammer, select USB from the blue drop-down list, then click the Refresh icon. Next, click the green Connect button.
The STM32CubeProgrammer screen will look like this.
Step 4. Transfer the Firmware to the Malahit DSP2
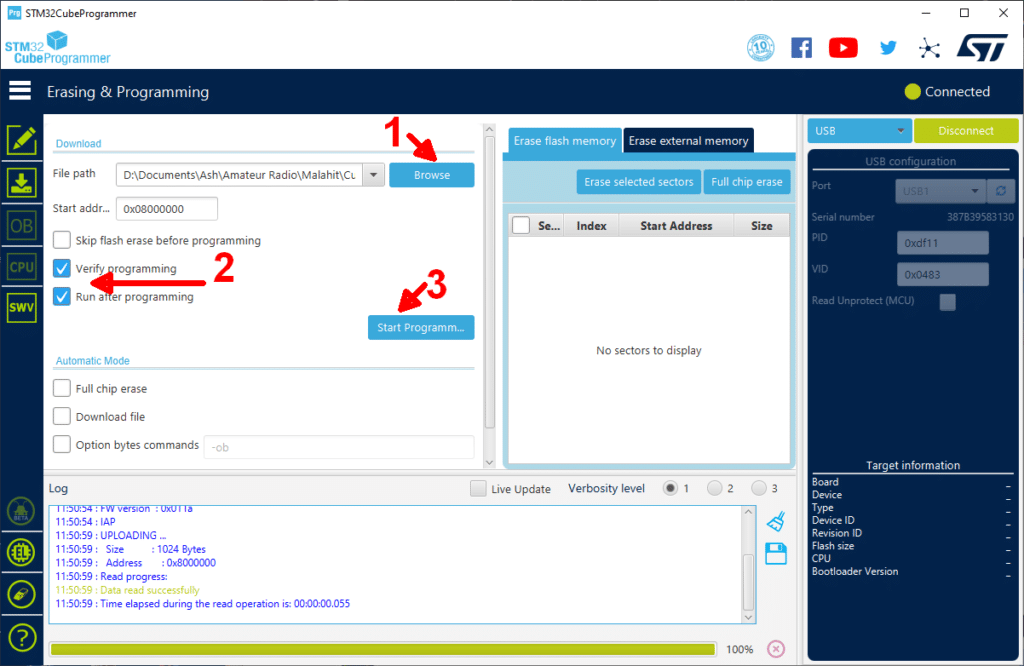
Click the second icon on the left – Erasing and Programming. The screen should change and look like this.
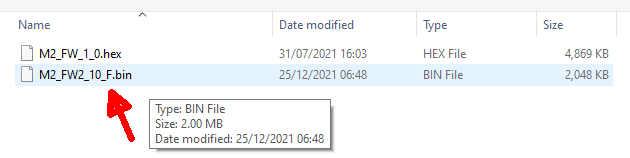
Find the firmware file that you downloaded and unzipped. It will be a file with a .bin extension. It is version 2.10F in this example.
Tick the two boxes you see in the image above, Verify Programming and Run after programming. Finally, click Start Programming.
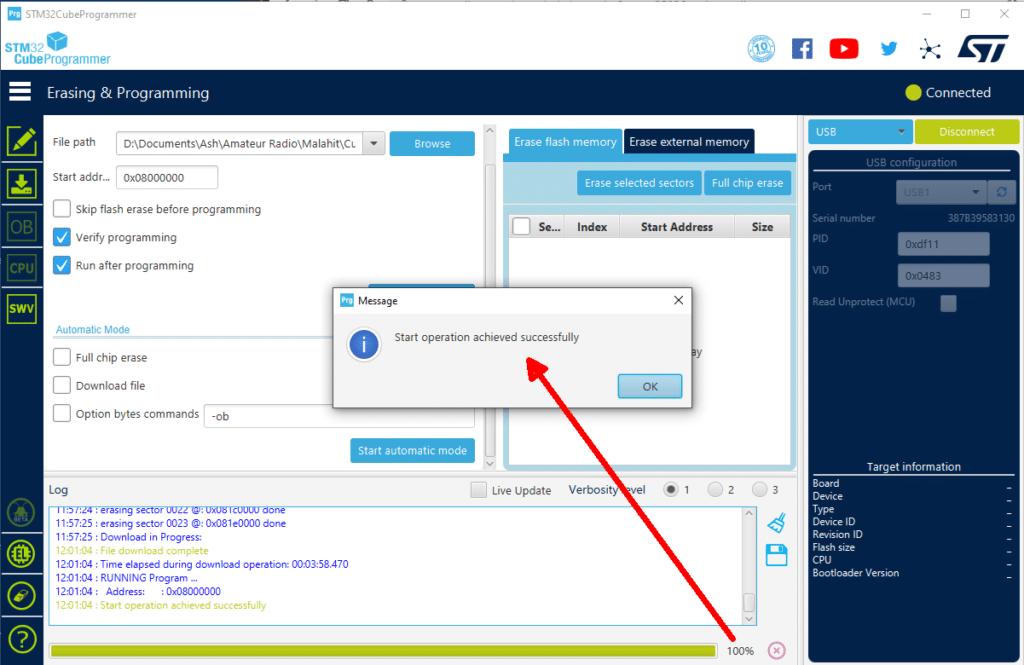
The LED will flash red and green, while the STM32 CubeProgrammer will show the progress of the firmware file upload at the bottom of the screen. A success message is displayed and you can click “Disconnect” now. If it fails, try again. You will not brick your radio if it fails, as it will remain at its previous level.
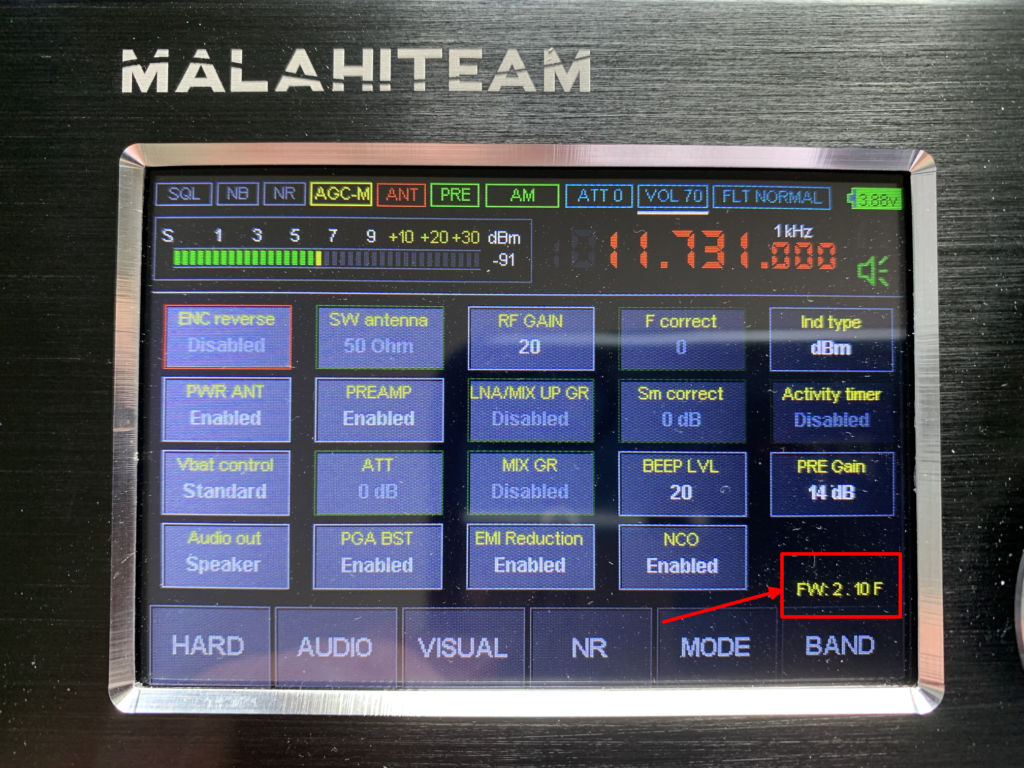
When you touch the Hard menu button, you will see the firmware version at the bottom right.
If Things Go Wrong
I had this verification error.
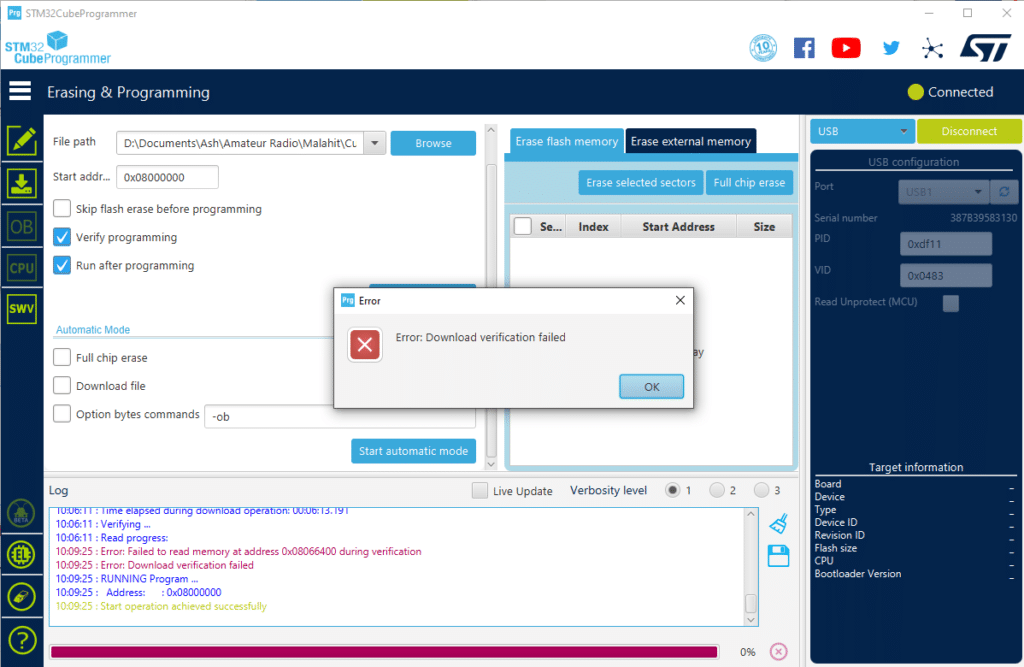
However, the radio seemed to work just fine, so I left it alone. I can always re-flash it if needed.