Category: Other

Programming Repeaters in the AnyTone AT-6666

Reading Time: 3 minutes

The AnyTone AT-6666 is a 10-metre band mobile amateur radio with roots in CB. You can open up the radio to include the entire range 25 MHz to 31 MHz. That has no appeal to me, so I won’t go there. One of my reasons for buying this radio is to focus entirely on the 10-metre band as we approach the sunspot peak next year. I had been using the radio for a few months, but had not bothered to learn how to enable the repeater split for the few 10 m FM repeaters.

Documentation

For reasons that don’t make business sense, the slim, printed manual for the AT-6666 is a quick-reference guide, rather than its title as a “User’s Guide”.  (I was once a Technical Editor at Unisys). There is a reference to repeater offsets, but that’s it. There is no mention of software or how to program the radio from a PC.

Software

I read a few 10-metre discussion groups and found out that free software for this radio is made by an unidentified source, as there is no mention of AnyTone on it. It’s called QPS6666. You need a special serial cable, which looks like a USB cable. I had forgotten that I ordered this cable with the radio; yet, a few days ago, I ordered another cable!

Connecting the Cable

The USB serial cable goes from the Windows PC to the back of the radio, where a mini-USB serial socket is available. A Prolific driver is required for this cable to work, as the regular Windows 11 serial port driver does not work with it. As this step has an element of chicken-and-egg to it, I will continue this point a little later. Upon installation of the software, the PC showed a new COM6 (the number might differ on your PC), and the software could see the radio (Setup > Communication Port > COM6) just fine.
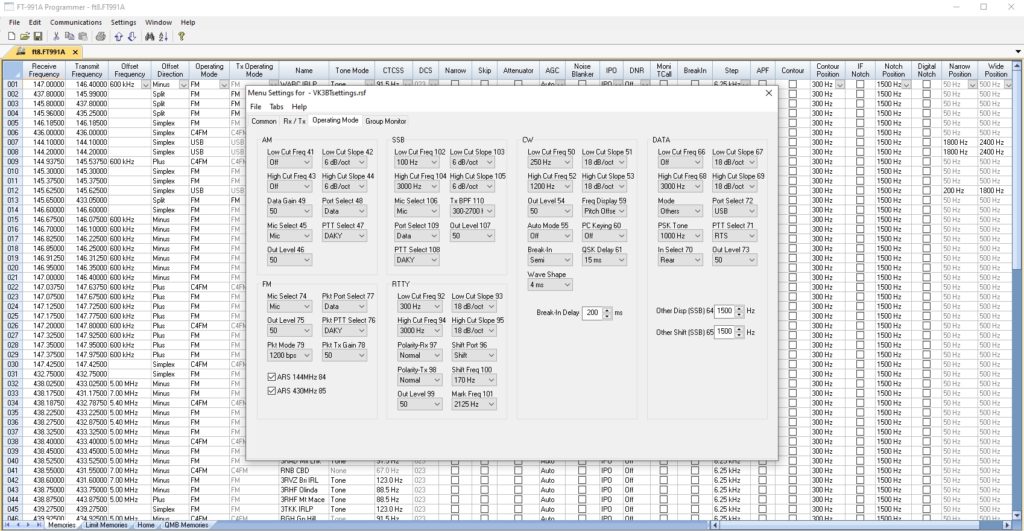
Prolific port on COM6.
Prolific port on COM6 in Device Manager.

QPS6666 Software

This software for the AT-6666 can be downloaded from a few places. It’s easy to install. To my knowledge, the software does not come with any manual, so I had to figure it out with trial and error. My goal was to put repeater offsets, which are minus 100 kHz, on the 10-metre band. The reception frequencies for the FM part of the band are pre-programmed in Band I. See the screenshot below. I picked one of the repeater frequencies at Channel 5. I changed the REP value from OFF to the minus sign. I did it to all the other repeater frequencies.

QX6666 software interface

Prolific Driver

The next day, the software could no longer see the radio, and Control Panel had lost COM6. See the screenshot below. I went to look for a source for the Prolific driver. I found this article, which is linked to the file and provides instructions, so I won’t repeat them here. I don’t know why I did not need to install this driver when I installed the QX6666 software. I have had this “lost Prolific driver” issue with another ham-radio program, and it seems to be Windows Update (10 or 11) that overwrites it. The good news is that once the radio has been programmed, you won’t need to use the software for some time. Reinstalling the driver is easy, and you need to reboot the PC afterwards.

COM6 was missing.
Control Panel no longer showed COM6.

Repeater Operation

Initially, I could not get the rig to work in repeater split mode. It was in VFO mode, and I had to press the FRQ button to get it into Channel mode. Be sure to keep pressing the Band button until it shows the I band in the display. For each channel that you designated as a negative offset, you will see “REP” against it. See the photo below. When you key the mike, the radio will transmit 100 kHz below the channel receive frequency. Enjoy using the 10-metre repeaters when the band opens.

AT-6666 front panel showing a repeater channel.

Updating the Firmware in Malahit DSP2

Reading Time: 2 minutes

Keen owners of the Malahit SDR radio will want to update the firmware to get the latest features, so this short guide will help them. First, the latest version should be downloaded and unzipped. The files are kept here: Malahit DS2 Firmware Downloads. I downloaded version 2.10F. These instructions are largely based on Manuel’s fine resource for the Malahit DSP2.

Step 1. DFU Mode

You need to get the radio in DFU Mode, which enables you to perform the update. Get the antenna out of the way, e.g. remove or fold it. Then perform these steps:

  1. Switch off the radio.
  2. Lie the radio flat on its back.
  3. Push the two buttons (Volume and Tuning) at the same time and hold then down until step 5.
  4. Push in the power button on the side and hold it in.
  5. Release the two buttons.
  6. Release the power button.
  7. When the LED at the side of the radio is blinking green and red, it is in DFU mode.

If you cannot get the LED blinking red and green, do this sequence faster, else it don´t work.

Once the radio is in DFU mode, you can plug in a USB data cable between the Malahit DSP2 and your computer. In Windows 10 Device Manager, you should see it when you expand Universal Serial Bus devices:

Device Manager

Step 2. Start STM32CubeProgrammer

You need the free STM32CubeProgrammer program from STM. Download it and install it. Run it in Administrator mode (right-click its icon and you will see the option).

Run as Administrator

Step 3. Connect Malahit DSP2 to Computer

At the top right in STM32CubeProgrammer, select USB from the blue drop-down list, then click the Refresh icon. Next, click the green Connect button.

Select USB port.
Click Connect.

The STM32CubeProgrammer screen will look like this.

Programmer screen.

Step 4. Transfer the Firmware to the Malahit DSP2

Click the second icon on the left – Erasing and Programming. The screen should change and look like this.

Erasing and Programming screen.

Find the firmware file that you downloaded and unzipped. It will be a file with a .bin extension. It is version 2.10F in this example.

Select .bin file.

Tick the two boxes you see in the image above, Verify Programming and Run after programming. Finally, click Start Programming.

Successful upload.

The LED will flash red and green, while the STM32 CubeProgrammer will show the progress of the firmware file upload at the bottom of the screen. A success message is displayed and you can click “Disconnect” now. If it fails, try again. You will not brick your radio if it fails, as it will remain at its previous level.

When you touch the Hard menu button, you will see the firmware version at the bottom right.

If Things Go Wrong

I had this verification error.

Verification error

However, the radio seemed to work just fine, so I left it alone. I can always re-flash it if needed.

Amateur Radio Regulations, AKA LCD, and Language

Reading Time: 4 minutes

I needed to look up the “regulations” for ham radio operation in Australia because of a Facebook post concerning some hams in the US berating two French-Canadians who were speaking in French to each other. Predictably, most of the discussion was by US hams, who were repeatedly citing FCC regulations about identifying in English, but confirming that the berating was rude behaviour.

Facebook post

Later in the discussion, the original poster added that he heard this on the NE Reflector. I don’t know exactly which one that is, but it would be one of hundreds of digital mode channels used by hams around the world. This one probably covers the Northeast corner of the US and close to the Quebec area across the border. Some are known as rooms, or talkgroups. This detail was missed by many people in the thread who did not bother to open every comment and sub-comment.

It was clear from this exchange that:

  • Many hams have no idea what a “reflector” is. Perhaps they know about talkgroups, or they don’t care to learn about digital modes.
  • Many did not even see the clarification about the reflector.

These digital channels are connected by the internet across the world to several cooperating local repeaters, so it’s possible for hams to join in the discussions from anywhere, if they have the correct interface. I have one such device, the SharkRF OpenSpot 1 hotspot. Alternatively, I could use a publicly accessible repeater in Melbourne, but I would need to use a keypad to select the correct reflector if it is not the default (and I am allowed to change it).

The American hams probably were on their local repeater, possibly unaware that it was linked to the internet, thus their FCC laws had no jurisdiction over the Canadian hams who, in turn, were probably talking on their local repeater. Just a normal thread on Facebook – these threads occur everywhere every day.

Where Are the Australian Amateur Radio Regulations?

I decided to look up two points mentioned in the above thread:

  • What language must we speak on air?
  • How often must we identify with our callsign?

I (being a professional SEO in the day job) turned to Google the answer and to my consternation I could not find it. I tried the following queries – all to no avail:

  • amateur radio regulations in Australia “identification”
  • amateur radio rules in Australia “identification”
  • amateur radio rules in Australia
  • amateur radio regulations in Australia
  • amateur radio “regulations” in Australia
  • amateur radio identification in english
  • amateur radio callsigns in english
  • amateur radio regulations
  • amateur radio regulations wia
  • amateur radio “regulations” wia
  • amateur radio identify every 10 minutes
  • amateur radio callsign every 10 minutes
  • amateur radio callsign after 10 minutes
  • acma station identification
  • acma station identify
  • acma identify
  • acma transmitter identify
  • wia transmitter identify
  • wia stations identify
  • wia amateur stations identify
  • wia amateur stations announce
  • wia operating procedures
  • amateur radio operating procedure
  • radio operating procedure
  • amateur radio procedure

I could not believe it. I went to the Wireless Institute of Australia (of which I am a member) website. Of course they have a page from where the answer can be found, except that you’d need to open about 20 PDFs one by one to inspect them. It is this page:

Those PDFs are on government websites, so it’s not the WIA’s fault that their contents don’t show up in a Google search of the kind I was trying.

At this point I called my friend Trevor, VK3TWC, as he was licensed not too long ago and I asked him where did he learn the regulations, as they are part of the licensing examination syllabus. I operate in Australia on a reciprocal licence, having qualified in New Zealand in 1978. I have never needed to look up the regulations again, at least not for the two points I was looking for. I was also off-air for 32 years. That was part of the problem – terminology changes over time.

LCD

Trevor mentioned the “LCD”. Yes, I had seen references to it and it did not mean Liquid Crystal Display. It means Licence Conditions Determinations – only a government employee (OK, I was one too, when in the air force) can come up with that phrase. It can be found here:

8. Operation of an Amateur Station (extract here)

(1)   Subject to subsection (2A), if the licensee makes a single transmission from an amateur station (other than an amateur beacon station or amateur repeater station), the licensee must transmit the call sign of any station being called, or communicated with, followed by the call sign of the licensee’s amateur station:

(a) at the beginning of the transmission;

(b) at the end of the transmission;

(c) if the transmission lasts more than 10 minutes — at least once during each period of 10 minutes, or part thereof, in the transmission;

by voice (using the English language), by visual image or by an internationally recognised code.

Interpretation

The above regulations/determination make it clear that:

  • For Australian radio amateurs, there is no requirement to speak in any particular language.
  • Regardless of the spoken language, we need to announce our callsign in English (voice or image) or code (Morse or other code), at least every 10 minutes.

Extrapolation

Equally, it follows that:

  • Our VHF/UHF repeaters might be connected through the internet to overseas repeaters, so we will hear relays of overseas conversations locally.
  • Our laws don’t apply to the overseas radio operators and it’s best not to tell them to speak in English. If you think they are breaking the law somewhere else, let their own authorities deal with it.
  • The repeater operator can choose not to participate in such links if foreign languages upset their local users.

SSTV Settings for the FT-991A Transceiver

Reading Time: 2 minutes

I wanted to play with slow-scan TV (SSTV) on my Yaesu-Musen FT-991A transceiver, so I collected the menu settings, which were in a video on Youtube by a French amateur (in English). To help anyone who is looking for this information, I am sharing the settings here.

YONIQ Software

I use YONIQ (updated version of MMSSTV) for receiving and sending SSTV images, largely from the ISS. It operates under Windows. This article is about the menu settings, so follow that link for details of using YONIQ.

Yoniq
YONIQ screen

FT-991A Setup

USB Type B cable

Your PC needs a spare USB port and you need a good USB Type B cable. The rig has its USB port at the rear. Such cables are used for printers, among other uses. Some articles swear by Tripp-Lite (affiliate link), but as I’m in Australia, I could wait for weeks for delivery. So I used one that has a couple of ferrite rings on it. It has no markings and I cannot recall where I sourced it. I also tried one with a shielded cable but no ferrite rings and it worked. So you might want to try an existing cable in your collection to get it going, then order a Tripp-Lite.

USB driver

Install the Silicon Labs USB driver from the Yaesu website (and from nowhere else). This is a safe choice, even though a more recent version might work. It will show in Control Panel > Device Manager > Ports only when it is connected to a switched-on radio.

COM ports in Device Manager
Device Manager

Menu Settings

These are the settings on the FT-991A.

  • 31 = 9600
  • 32 = 10 ms
  • 33 = Enable
  • 60 = DAKY
  • 62 = Others
  • 64 = 1900 Hz (see video link at the end)
  • 65 = 1900 Hz (see video link at the end)
  • 70 = Rear
  • 71 = DTR
  • 72 = USB
  • 74 = Rear
  • 76 = RTS
  • 77 = USB
  • 79 = 9600
  • 106 = Rear
  • 108 = RTS
  • 109 = USB

Getting your Rig Back to Normal

Your rig settings for SSTV will change your previous menu settings and it can get tedious if you are switching back and forth, say from FT8 or voice to SSTV. I use RT Systems FT-991A Programmer and it has a way to store menu settings separately from memories. I downloaded settings from the radio – the “before SSTV” and the “for SSTV” conditions and saved them as separate files. So, for SSTV, I upload the “for SSTV” menu to the rig. Afterwards, I upload the “before SSTV” file (in my case it is called an “FT8” file and it is also my regular voice mode settings).

RT Systems FT-991A Programmer screen
RT Systems FT-991A Programmer menu settings screen

73 de VK3BT

Other Solutions

Here are some articles written by others on this topic. I have not tested them personally.:

Eric Ronald Harmon writes via Facebook:

I use (data vox) for keying and skip the rig control on sstv….so nothing has to change for voice…ft8….sstv…winlink…and fm packet I just select the mode and freq. And go.

Setup menu option #142…= data and activate Vox in M-list menu will show on screen as D.vox There are gain and delay and level settings also, but mine are all at default. Menu #s 146, 147, 148. Good luck. When set like this almost no change is necessary for multiple modes.

FT-991A Setup for Digital Modes (for Windows 10 and a USB cable) – by VK3BT

FT-991A
Reading Time: 3 minutes


I have a Yaesu Musen FT-991A transceiver for my amateur radio hobby. I returned to this hobby after about 24 years, so my interest is in the new developments that came during my absence. Digital modes are new to me, so I have started with FT8. It’s a weak-signal mode that sends a warbling tone that can only be decoded by a computer. Although you might think the band is “dead” because you cannot hear any voice QSOs, the spot frequencies allocated to digital modes are probably “alive”.

More information about digital modes can be found online, such as this article about WSJT – one of a few programs that you can use to use such modes.

FT-991A
My setup

There are a few articles and videos online that might help, but I found that they gave conflicting information, or the menu numbering was different. Some were written for the FT-991 (no suffix) (predecessor of my rig) and/or for Windows 7. After a while, my rig’s settings were all over the place and I found it best to do a factory reset so as to have a reliable starting point. This is my setup.

FT-991A Setup

USB Type B cable

Your PC needs a spare USB port and you need a good USB Type B cable. The rig has its USB port at the rear. Such cables are used for printers, among other uses. Some articles swear by Tripp-Lite (affiliate link), but as I’m in Australia, I could wait for weeks for delivery. So I used one that has a couple of ferrite rings on it. It has no markings and I cannot recall where I sourced it. I also tried one with a shielded cable but no ferrite rings and it worked. So you might want to try an existing cable in your collection to get it going, then order a Tripp-Lite.

USB driver

Install the Silicon Labs USB driver from the Yaesu website (and from nowhere else). This is a safe choice, even though a more recent version might work. It will show in Control Panel > Device Manager > Ports only when it is connected to a switched-on radio.

COM ports seen in Device Manager

The Properties of these ports need to match those in the radio’s menu settings, but I noticed that I have one stop bit and not two. It works like that, so I have left it as-is.

Port properties
Port settings

FT-991A Menu settings

I settled on the following, based on a YouTube video by a fellow Aussie VK7HH

There are just four primary settings, as per the video:

  • 31 = 9600 bps (this can be anything, but some other program I tried only works at 9600, so I settled on this speed)
  • 32 = 100 msec (default is 10)
  • 108 = RTS (default is DAKY)
  • 109 = USB (default is Data)

Next, the following settings were added after reading dozens of tips:

  • 33 = Enable (factory default)
  • 62 = PSK (default is Others)
  • 70 = Rear (factory default)
  • 72 = USB (factory default)

There are two “mystery” settings suggested by some. I am not sure about them, but I have left them at these values:

  • 60 = Off (factory default)
  • 71 = DTR (default is RTS) This one is said to be for Win 7 but I have Win 10. I didn’t think that would matter, but I have made a note. I found that DAKY works equally well, hence this is a mystery setting.

Of course, the software settings also need to match. This is why some people have a different mix of settings and they also work.

JTDX settings

I use JTDX, which is based on WSJT-X, so both have identical settings.

General settings
Radio settings
Audio settings
Reporting settings
Advanced settings

Gotchas

There is a gremlin that changed my settings recently – about four of them (!), so I keep a sheet with these settings near the rig. This is most likely the regular Windows update, which somehow reset some rig settings to their defaults. That might not make sense, but I certainly don’t change my rig settings.

Another recent gremlin is that the FT-991A appears to transmit when no digital software has been started. If the rig is switched on and I shut down my laptop, the act of closing the lid causes the rig’s transmit light to come on and about 2 Amperes are drawn, but the PO reading is nil. I have yet to find the cause.

Keeping perfect time

Your computer’s time needs to be perfect, i.e. synchronised to internet time, else you might not be able to decode the signals. There are many such programs, but I use NetTime. Start it up and your PC will not need to worry about time drift.

President Obama’s whitehouse.gov pages archived

New home for Obama's White House pages

Reading Time: < 1 minuteAfter Mr Donald Trump became the president at noon today (USA EST), many reported that the whitehouse.gov website removed references to Climate Change and LGBT. That isn’t entirely accurate. The website up to that point has been archived and can be found at https://obamawhitehouse.archives.gov/.

New home for Obama's White House pages
New home for President Obama’s White House pages

The LGBT URL was https://www.whitehouse.gov/lgbt but it redirects to this temporary page https://www.whitehouse.gov/transitionsplash/

White House 404
404 error page

The page is now at https://obamawhitehouse.archives.gov/lgbt – why didn’t someone tell the new team how to set up a redirect script so that all old URLs that won’t exist at whitehouse.gov can still be found. Maybe they don’t want them to be found?

LGBT pages
New URL for LGBT pages – click this image to go there.

The climate change pages are now at https://obamawhitehouse.archives.gov/the-record/climate

Climate pages
The Climate Change pages at its new URL – click image to go there.

Other old White House pages

As best as I can tell, if you have an old URL, just replace whitehouse.gov/ with obamawhitehouse.archives.gov/ and add the rest of the URL to it. For example, to get to whitehouse.gov/vp (to reach Joe Biden’s page), just go to obamawhitehouse.archives.gov/vp and so on. Looks like it’s all there at the archives.gov location, but some links will have broken.

Inspiring employees to “Adopt Adapt Flourish” – a book review

Reading Time: 3 minutesMy earliest memory of a workplace change was in the late 1970s. I worked for a whitegoods manufacturer with an office staff around 20 and about 50 factory workers. I was a part-time student and worked in the “cost office”. We costed all the appliances on a large sheet of ruled paper, otherwise known as the original spreadsheet. Each screw, washer, motor, sheet metal, etc was listed and costed, to arrive at the cost of materials. Continue reading

Book review: Urnabhih: A mauryan tale of espionage, adventure and seduction

Reading Time: 4 minutesUrnabhih means a spider’s web in Hindi, a language you may need to know to get the best value from this historical fiction.I bought the Kindle edition, although a paperback is also available from Amazon India.

The plot

The spider’s web refers to a web of deceipt and intrigue that is cast across the Mauryan empire during the reign of Chandragupta Maurya (321 – 297 BCE), one of the legendary emperors who ruled much of the lands that span modern Pakistan and India. The protagonist is Misrakesi, a former danseuse-turned-femme-fatale now in the employ of the kingdom’s secret service. She saves the emperor’s life early in the book and then happens to go to Ujjaini, where the Kama Sutra is being drafted with her help. Very convenient, if you ask me.

Continue reading

Doug Heil bans me from the ihelpyou forum – for life

Reading Time: < 1 minuteWhile going through my unopened email from last month, the following text caught my eye:

You have received an infraction at SEO Best Practices Search Engine Forums.

Reason: Multiple Spammer

This infraction is worth 50 point(s) and may result in restricted access until it expires.  Serious infractions will never expire.

All the best,

SEO Best Practices Search Engine Forums

Again, please do not reply to this email. You must go to the following page to reply to this private message:

http://www.ihelpyou.com/forums/private.php

Continue reading

Did the Wayback Machine die and nobody noticed?

Reading Time: < 1 minuteThe Wayback Machine or archive.org served a good purpose. In its early years it tried to keep a copy of many pages from websites great and small. People who inadvertently deleted their website were able to recover some of the content through it. More recently (five years ago, not five weeks), it couldn’t cope with the quantity of pages and people complained when it hadn’t indexed their pages. Many SEOs blocked its spider from their sites.

When I checked some well-known sites, I was surprised that they hadn’t been archived for some years:

Continue reading

Mastodon