|
Getting your Trinity Audio player ready...
|
If you attempted to flash OpenGD77 firmware onto a TYT MD-UV390 (or MD-UV380 / Retevis RT-3S) and ended up with a blank/dark screen, the hardware isn’t fried. A dark display typically means raw binary code was written without the necessary display driver initialization headers that the OpenGD77 installation package applies automatically.
Additionally, using command-line DFU tools (dfu-util) with Zadig’s WinUSB driver breaks OpenGD77 CPS’s native DFU detection (STTubeDevice30), leading to errors like “Radio not connected, or not in DFU mode.”
Here is the straightforward method to restore the screen and successfully finish the OpenGD77 installation.
Table of Contents
Prerequisites
-
OpenGD77 CPS installed on Windows. My version is R2025.03.23.01.
-
OpenGD77 Firmware Package:
OpenMDUV380.zip(keep it as a ZIP file; do not extract the.binfile manually). -
Donor Codec Binary: Official TYT MD-9600 firmware binary (
MD9600-CSV(2571V5)-V26.45.binor similar) required for DMR voice decoding. -
TYT CPS Suite: Installed on the PC (this provides the required native
STTubeDevice30.dllandSTDFU.dlldrivers).
Step 1: Revert USB Drivers to Standard STMicroelectronics DFU
If you previously used Zadig to install WinUSB for dfu-util, OpenGD77 CPS will not see the radio. You must restore the default STM driver first:
-
Turn the radio OFF.
-
Put the radio into DFU mode: Press and hold PTT + Top Side Key while switching the power knob ON (the LED will flash red/green).
-
Connect the radio to your PC via USB.
-
Open Device Manager (
Win + X> Device Manager). -
Expand Universal Serial Bus devices (or Universal Serial Bus controllers).
-
Right-click Digital Radio in USB mode (or STM32 DFU).
-
Select Uninstall device.
-
Crucial: Check the box “Delete the driver software for this device” and click Uninstall.
-
Unplug the USB cable, wait 5 seconds, and plug it back in.
-
Windows will automatically re-bind the radio to the standard
STTubeDevice30driver using the DLLs installed by the official TYT software.
Step 2: Flash OpenGD77 via OpenGD77 CPS
Once the driver is reverted, OpenGD77 CPS can handle the full firmware write along with the display controller initialization payload.
-
Launch OpenGD77 CPS.
-
Navigate to Extras > Firmware Loader.
-
Under Radio type, select MD-UV380 / RT-3S.
-
Click Select official firmware (donor) file and select your MD-9600
.binfile. -
Click Select Open firmware file & update and select the original
OpenMDUV380.zippackage. -
The software will begin flashing. Wait for the progress bar to reach 100% and display “Upload complete”.
Step 3: Reboot and Verify
-
Unplug the USB cable from the radio.
-
Turn the top volume knob OFF.
-
Turn the volume knob back ON normally (without holding any side buttons).
-
The radio screen will light up, displaying “Settings updated” followed by the main OpenGD77 boot screen.
Summary of Lessons Learned
-
Avoid Raw
dfu-utilWrites: FlashingOpenUV380.binviadfu-utilat offset0x0800C000writes the firmware payload but skips display setup, leaving the LCD uninitialized (dark). -
Driver Compatibility Matters:
dfu-utilrequiresWinUSB, but OpenGD77 CPS strictly requiresSTTubeDevice30. UninstallingWinUSBvia Device Manager allows OpenGD77 CPS to regain control and write the full container.
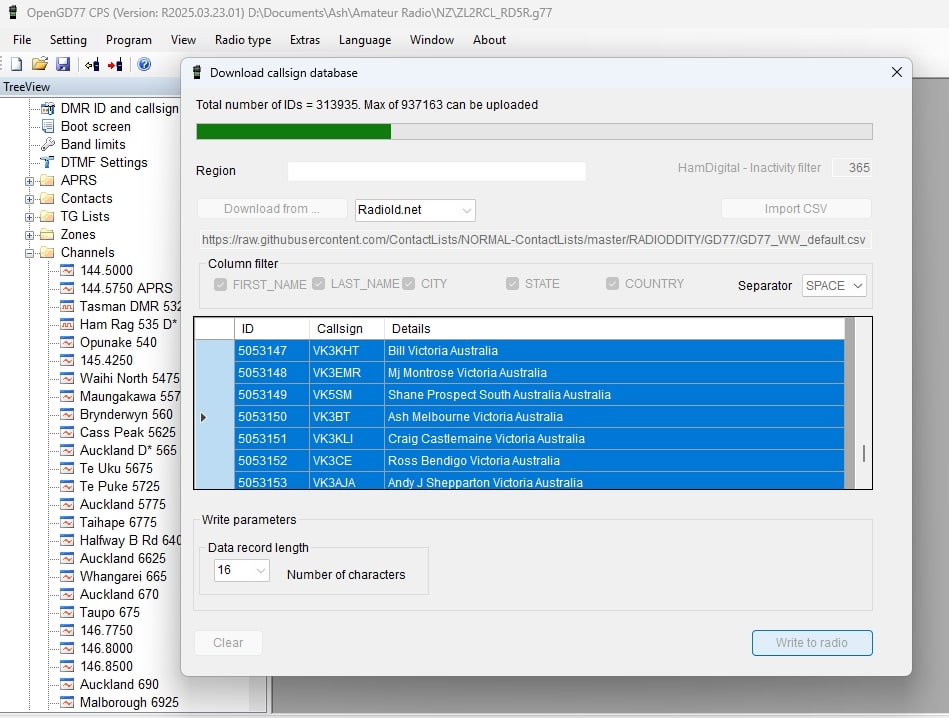
Callsign Database
It’s worth uploading the entire list of callsigns to the rig, so that they will display when their owner is online. There were about 314,000 when I downloaded them. It takes about 5 minutes.