I was cleaning up a 10-year old HP envy m6 laptop that had Microsoft Windows 10 and Office 2013 on it. In the end, I decided to wipe it clean with a fresh instance of Windows 10. I happened to have an ISO, so I burnt a DVD and started the installation. The machine asked whether I had the product key or whether it was a digital delivery. I chose the latter copy because it was one of those “free” upgrades from Windows 7 or 8, and I thought nothing more of it. (Old laptops cannot take Windows 11, so that was not an option.)
Table of Contents
Windows Lied
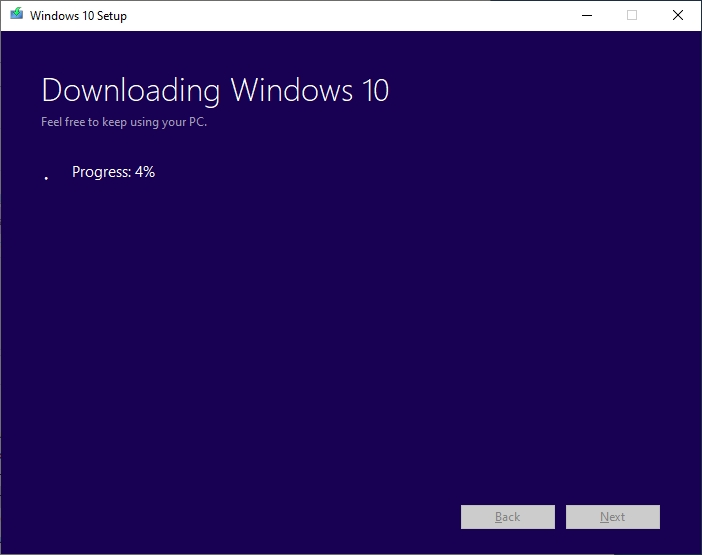
After the latest copy of Windows 10 was downloaded, the installation dialogue asked for the product key! Nothing I tried would let me bypass it. I changed the BIOS setting to first boot from the DVD drive, but it did not work (I have heard from another HP user that I’m not the first to report this.) I wanted to install Windows 7, for which I have a key, then do the Windows 10 upgrade. That DVD would not boot either.
I also found that my valid Windows 7 and 8.1 keys were not accepted because I had neglected to deactivate the key before disposing of the machines where I had installed them. What can you if the machine dies before you can deactivate?
Bootable Windows Drive
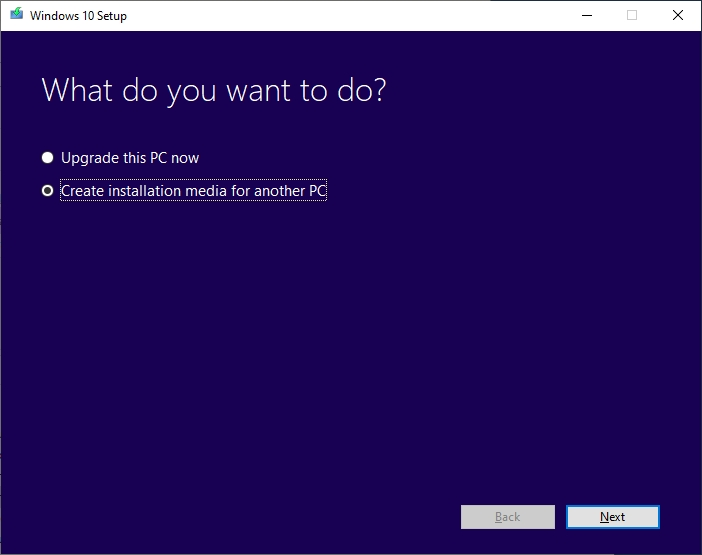
My next approach was to make a bootable USB drive with a copy of Windows 10 on it. I obtained it from Microsoft (two options):
This is the process for creating such a bootable USB drive. You can instead make a bootable DVD.
Choose the first option
Choose the second option
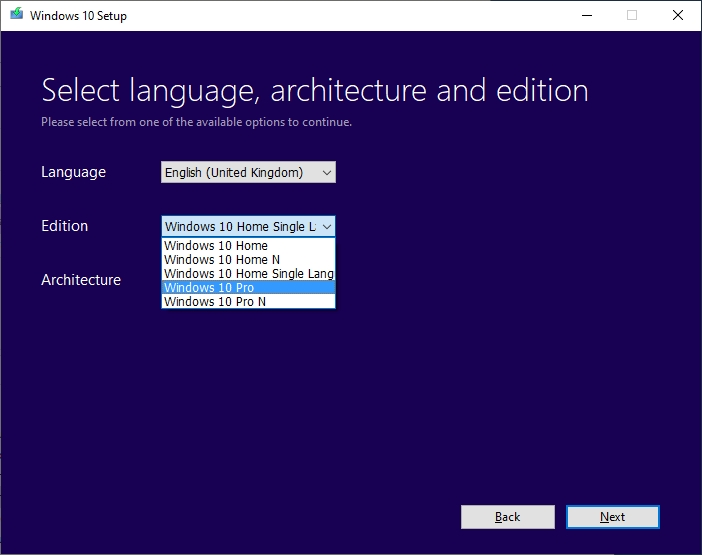
Select language, architecture, and edition
I chose English (UK), Windows 10 Pro and Windows 64.
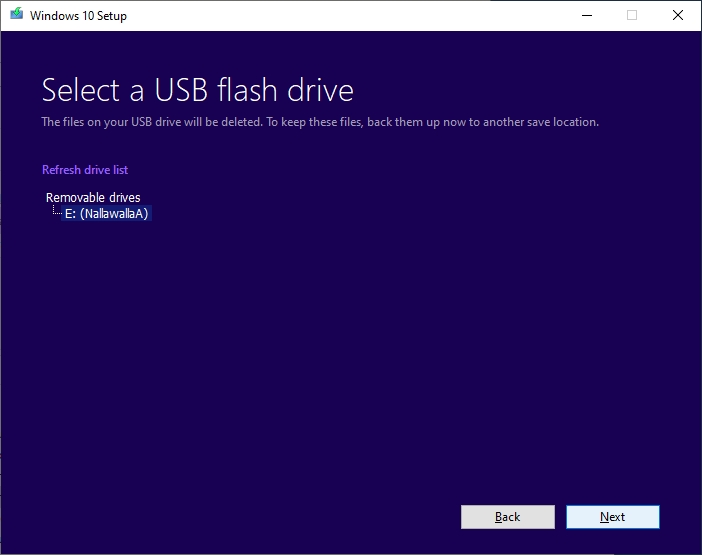
Choose the type of drive
I chose a USB drive.
Select the drive letter
I selected the drive.
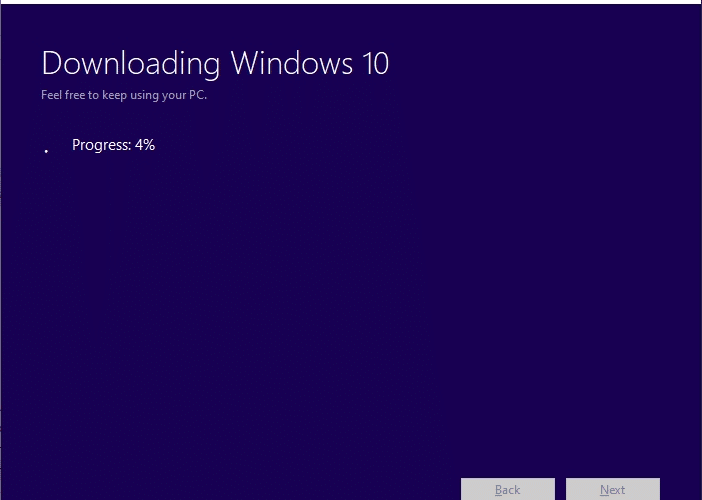
Start downloading
The last step is to start the download.
That should be all. The tool disappears when the task is completed. Use it to install Windows 10 from the USB drive. You will still need a product key.
My Outcome
I had read a couple of news items:
The trick of going to Microsoft’s Accessibility page to get a free Windows 10 upgrade no longer works, as Microsoft removed that offer three years after its official end date.
You could enter a valid Windows 7 or 8 product key when the Windows 10 installation process, except in my case I had forgotten to deactivate mine long ago.
In the end, I purchased a fresh ptoduct key from one of the third-party sellers, not Microsoft.
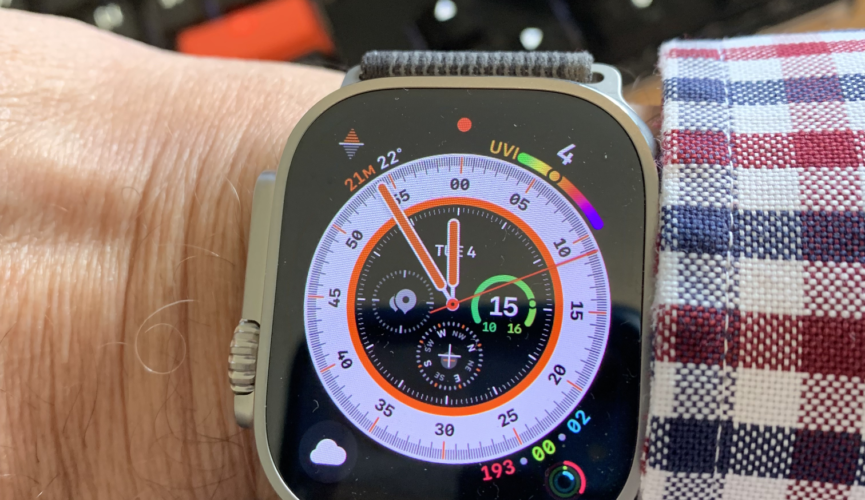
My Christmas present to myself this year was the top-of-the-range Series 8 Apple Watch. It was my first Apple watch and bought to replace a dead smart watch. It has the cellular option, but I don’t go out without my phone, so I won’t be rushing to get an e-SIM for it. I’m happy that I can talk through the watch when my phone is in another room. It has many features that I will discover one by one.
This isn’t a review because you can find plenty of them online. This is the unboxing.
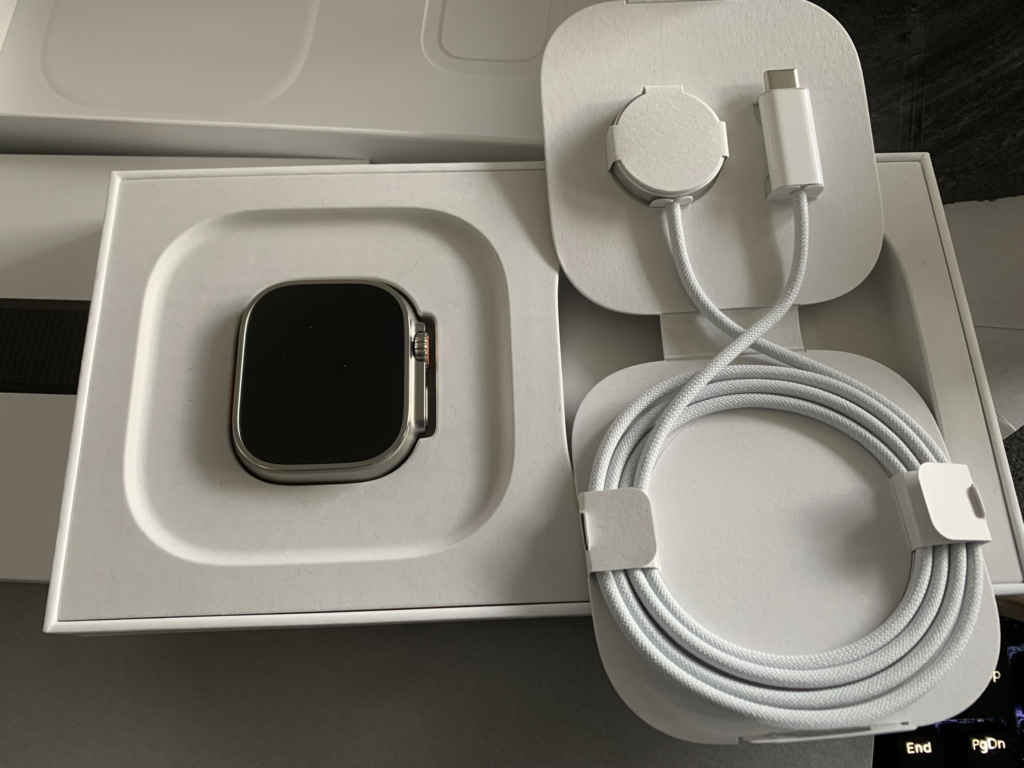
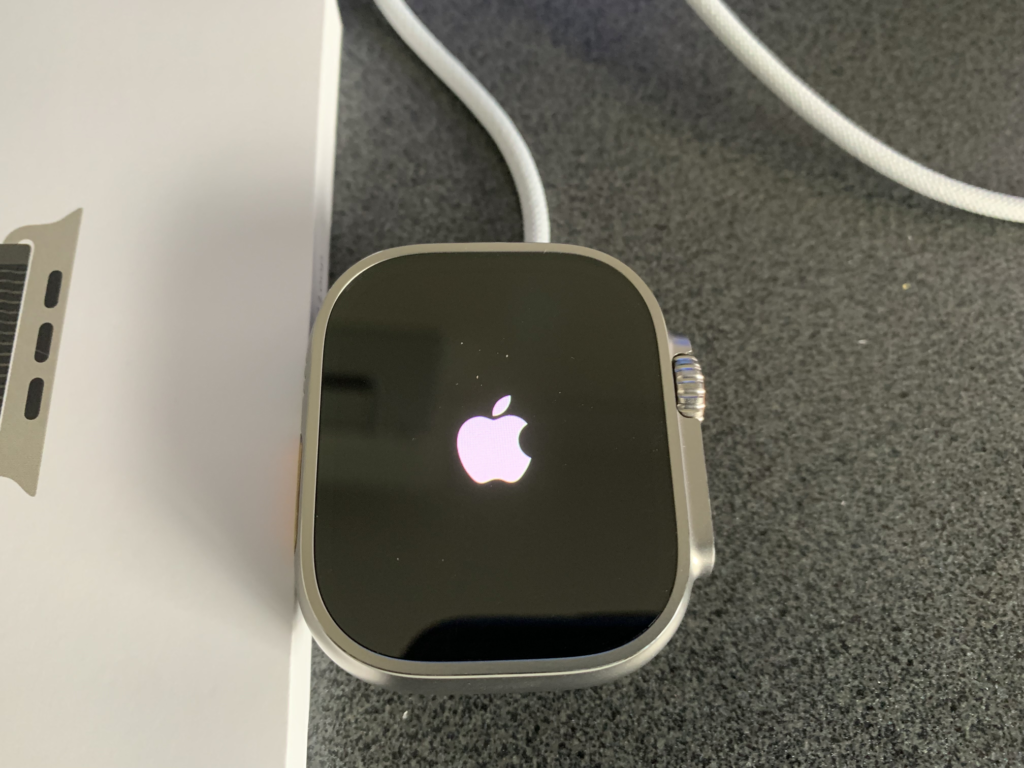
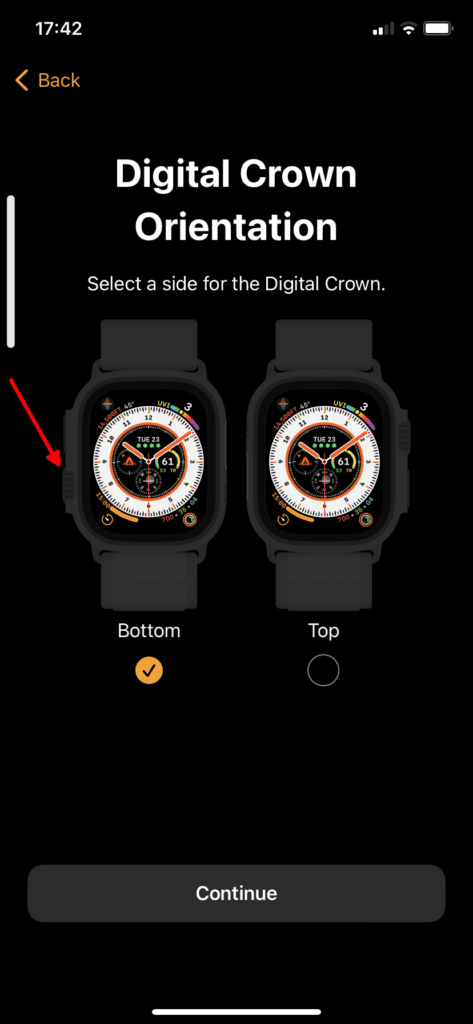
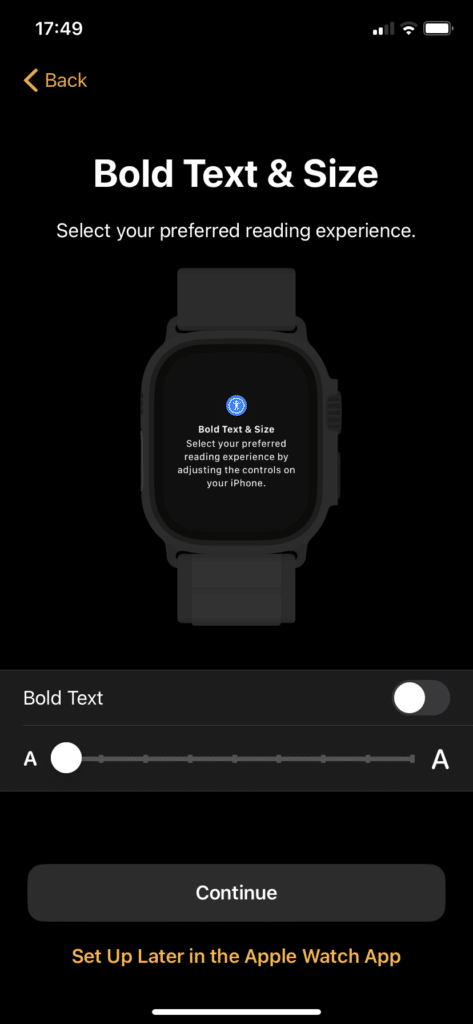
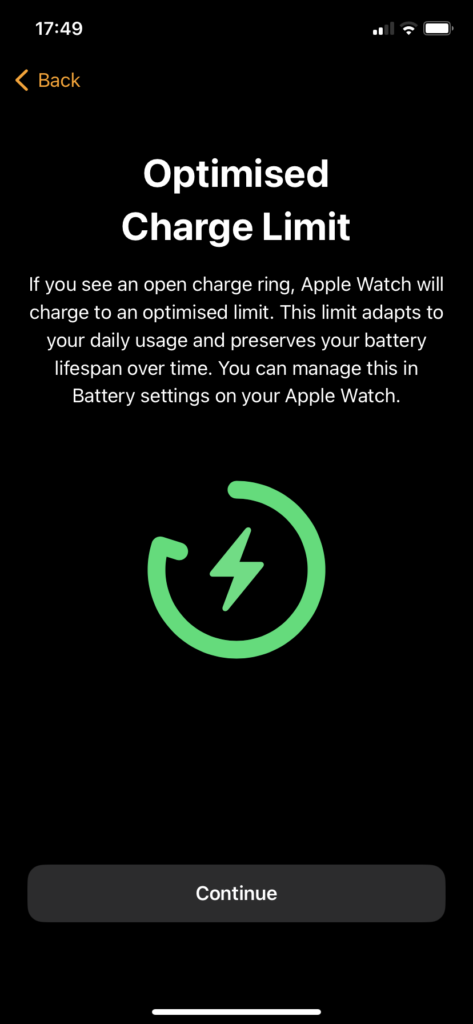
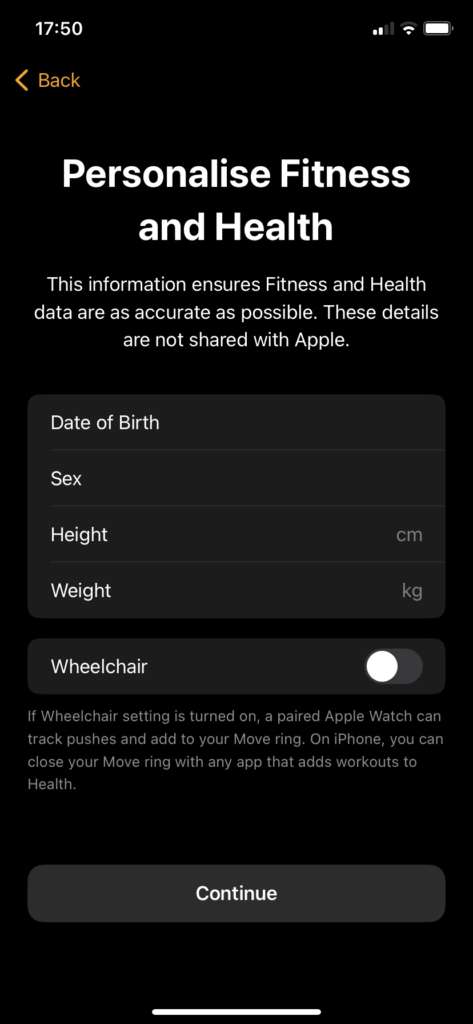
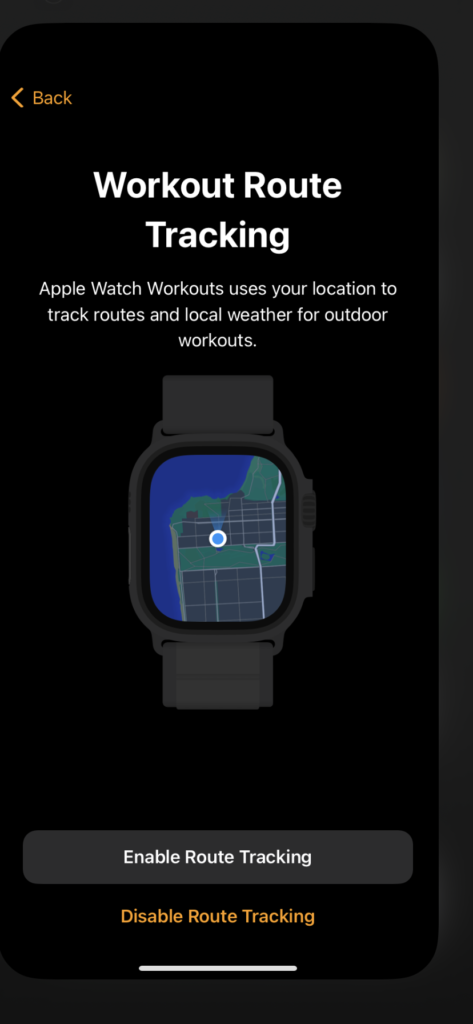
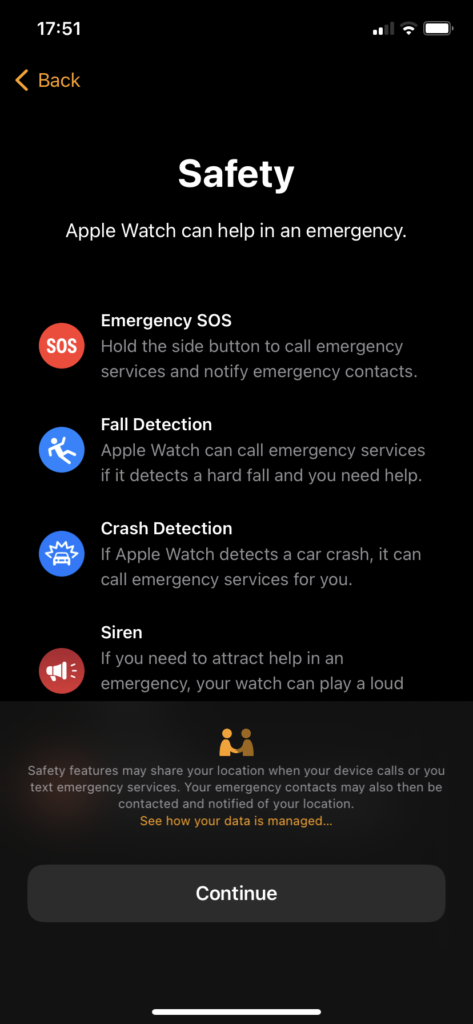
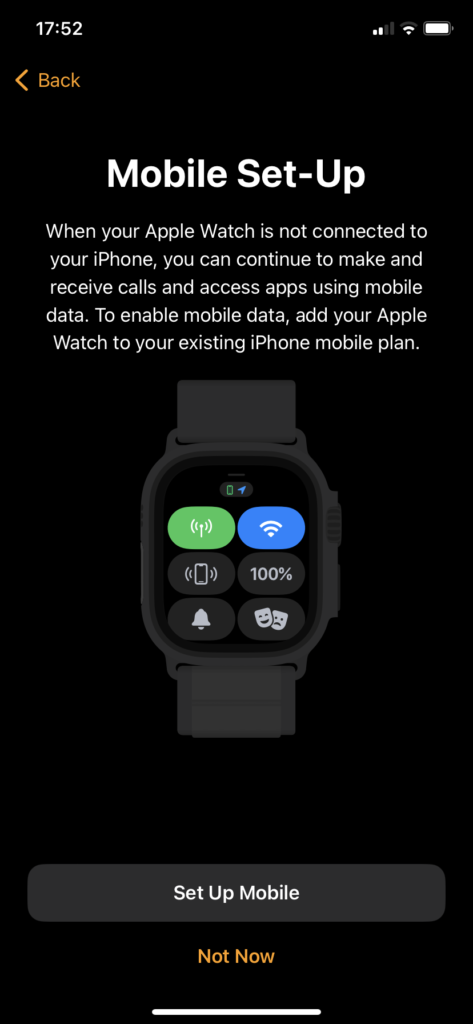
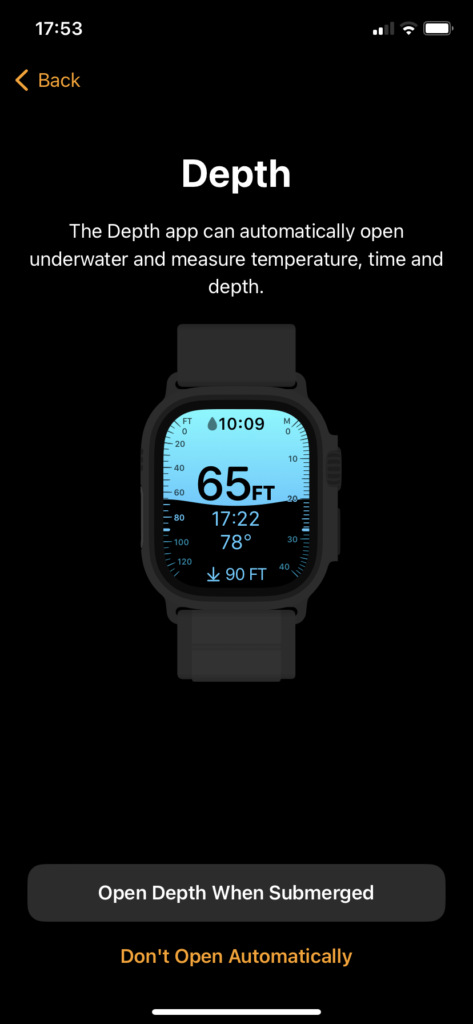
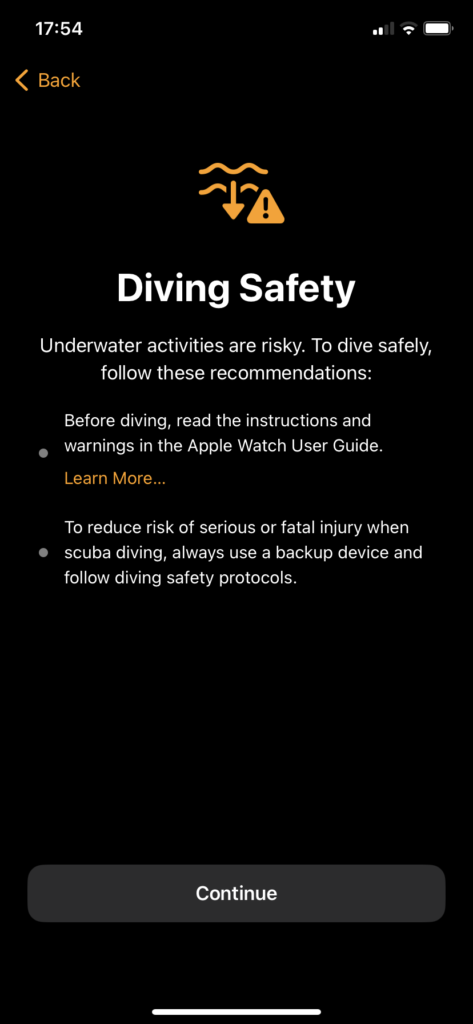
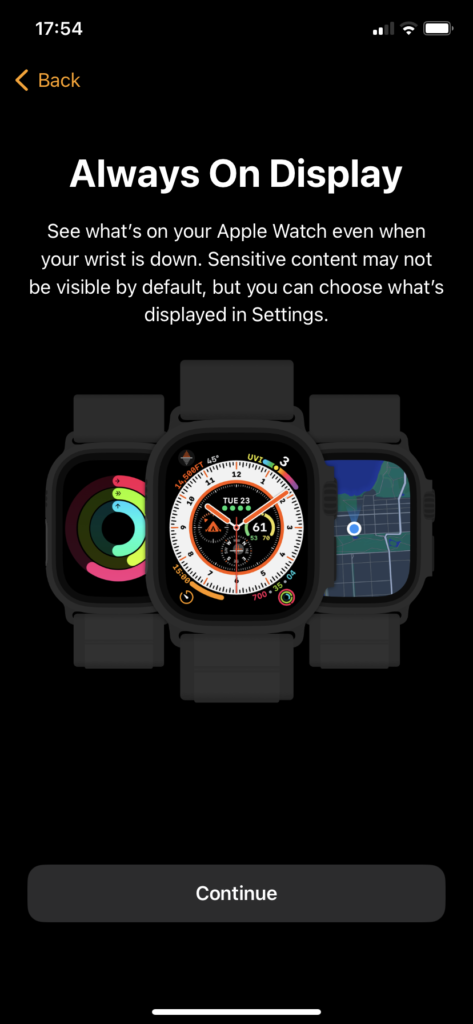
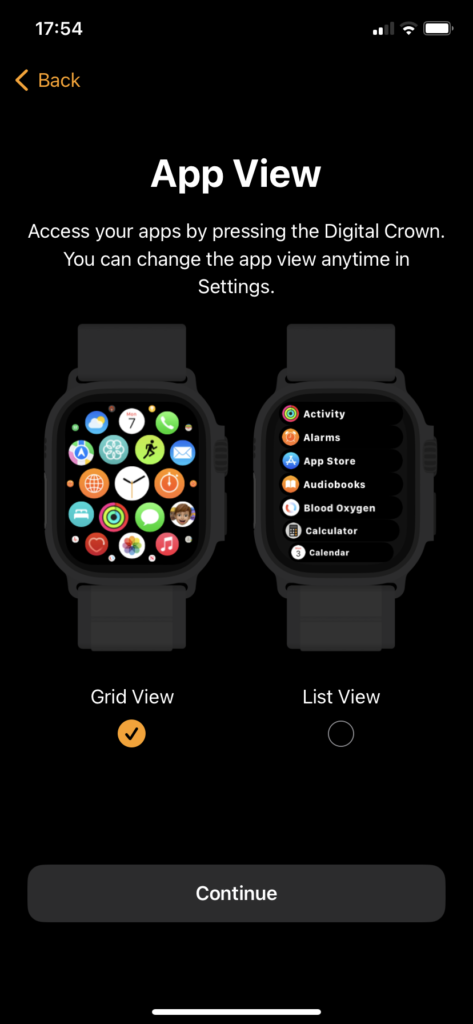
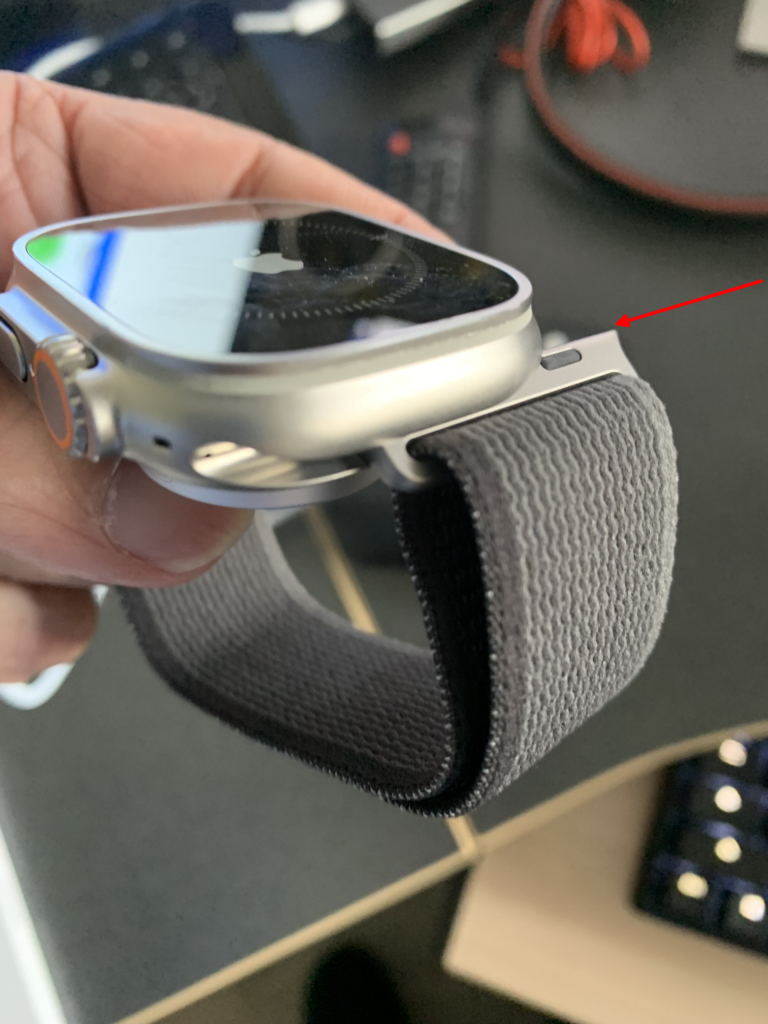
Apple knows how to design packaging as good as its products.Contents of the boxI charged it before going too far, but it came with a healthy charge.Setup was started on my iPhone XRSetting up for myself.Pairing the watch.Choosing the dominant hand.Choosing the hand you will use (Right, in my case)Choosing the size of text.Battery usage is smart.The Apple watch shares settings with other Apple services.Health and fitness settings.Tracking your activity.Workout route tracking.Getting health notifications.Checking your heart medications.Emergency settings, including calling Emergency services.Setting up your phone to access apps and data.Apple Pay setup.Setting up the Action button.Underwater settings.Diving safety tip.Always-on.Phone apps on the watch.Syncing in progress.Setup is complete.Sliding in the strap.The Apple Watch on my wrist.
That’s all, folks! I am happy with my Apple Watch Ultra.
For some years, Apple has disabled sync between Microsoft Windows Outlook’s Calendar, Notes and Contacts and iPhone/iPad etc. It took me a long time to realise this, as I would save new contacts on either platform, amend outdated into and then wonder why the other device had not synced. I would ask in Apple communities, and the advice never made sense to me, and I would forget it for a while. I coped by repeating data entry in both devices, but it was getting ridiculous.
Table of Contents
The Issues
For reasons I don’t know or care, Apple and Microsoft products stopped cooperating some years ago; I believe it was after iOS 9. We are presently at iOS16! Whenever I asked for help in the Microsoft Outlook and Apple iPhone forums, the responses were not helpful.
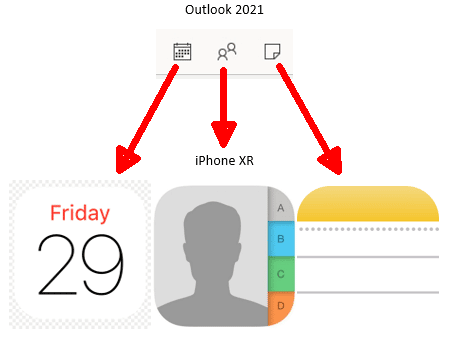
This image illustrates what I wanted:
Outlook to iPhone sync
I do not use Office 365 or the Outlook app on my phone. I don’t use Microsoft Exchange. I just use IMAP and POP3 to fetch and send email from my own hosted domain. No Gmail. I just wanted to use the Apple apps that could once be synced with iTunes. The helpers in the forums could not understand what I thought was a simple question.
Here is the Solution
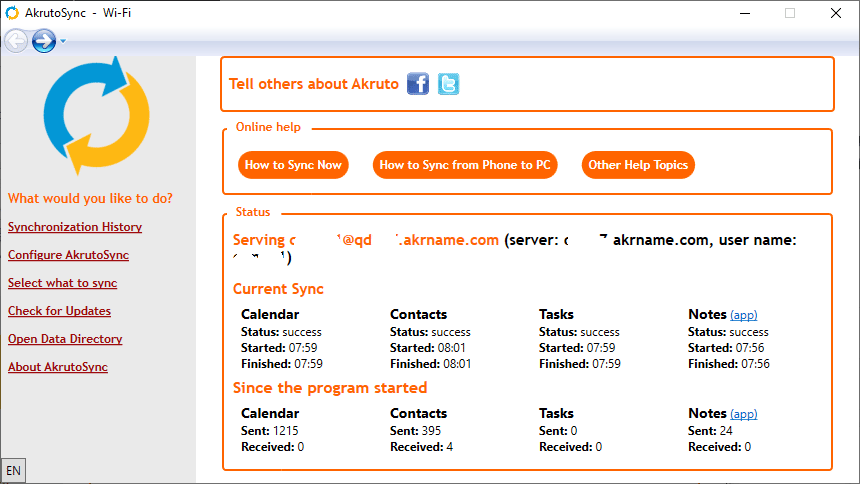
Forget iTunes. It’s not even useful in Windows to manage the placement of your app icons and certainly irrelevant for syncing your iPhone with Outlook. I found a paid program AkrutoSync, which has a free, 7-day trial. I went for the Basic option of a single PC and unlimited devices for US$39.95, a one-time payment. You can get it from Akruto here: https://www.akruto.com/ (no affiliate link there)
Successful transfer of my desktop data to my iPhone.
Configuring AkrutoSync might seem weird if you are like me and only use POP3 or IMAP to fetch email. It requires you to add a dummy Microsoft Exchange account on your phone if you choose syncing at home via Wi-Fi. Follow the instructions carefully and you’ll be syncing automatically in both directions all the time. It is instant – I added a calendar entry on my desktop and it was already on my phone by the time I looked it up.
I did not know that people were creating a QRcode for their LinkedIn profile pages. That isn’t surprising, as QRcodes are an easy way to display a URL – point your phone camera at one and you will see its destination. Click that button and your phone browser opens the URL.
I don’t network much with strangers, but if you do, here is the easiest way I could find. No need to search Google, at least in Windows, for the option seems to be built into Chrome. Many of the online sites need you to sign up before you can download the code.
Steps
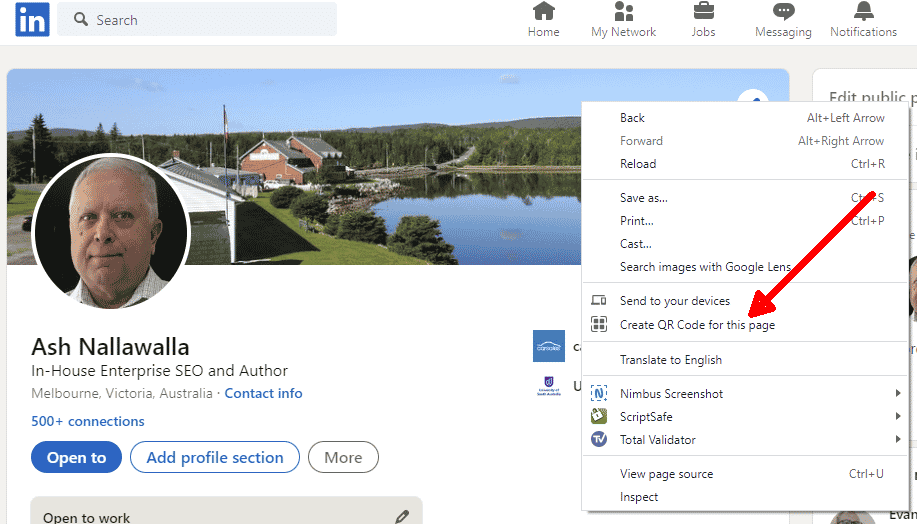
Go to your LinkedIn profile page. You can reach it by clicking Me > My Profile in the top menu.
Right-click a blank area, not an image and you will see the option to create a QRcode for this page. Click that option
Download the QRcode and use it on your website, business card or elsewhere.
LinkedIn profile pageQRcode for my LinkedIn profileQRcode as seen in a phone camera.
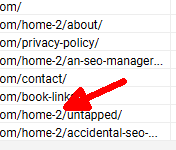
I was going nuts after seeing some of my pages showing a new “path” /home-2/ in their URLs.
What’s this /home-2?
I could not find any discussions online about this feature, so decided to put up this post. I was at the point of reinstalling WordPress on this new site, which has about six pages. I deactivated all plugins but that made no difference. I removed unwanted plugins and themes. I exported all data, ready to import into the rebuilt site.
My home page is also called Home and this feature causes child pages to be given a URL with the parent page name in the slug. So all the pages I placed as a child of Home were given a /home-2/ path in the slug. As I did this to some pages after they had been saved earlier, they were getting 301 redirected to the longer URL. I hope this helps someone with the same mystery to solve.
I have almost finished writing three books (“Tapping Organic Leads for Profit” series) and as a former professional editor at Unisys back in the 1990s, I had to get a second opionion. I am an Australian but writing in American English. The books are a vanity project, as I should be retired according to the calendar and, therefore, am not publishing them to become rich or famous. The budget allowed for a subscription to the Chicago Manual of Style (US$30/year) and PerfectIt (US$70/year). They work together if you use the same email address.
Table of Contents
CMOS Online
The Chicago Manual of Style is one of the well-known American style guides and is liked by many editors. Companies can and do have their own house styles, as did Unisys when I was a senior editor in 1989-1991. I used the Hewlett-Packard house style when I did a contract task there. Apart from browsing it online, in this context, you access it through PerfectIt.
PerfectIt
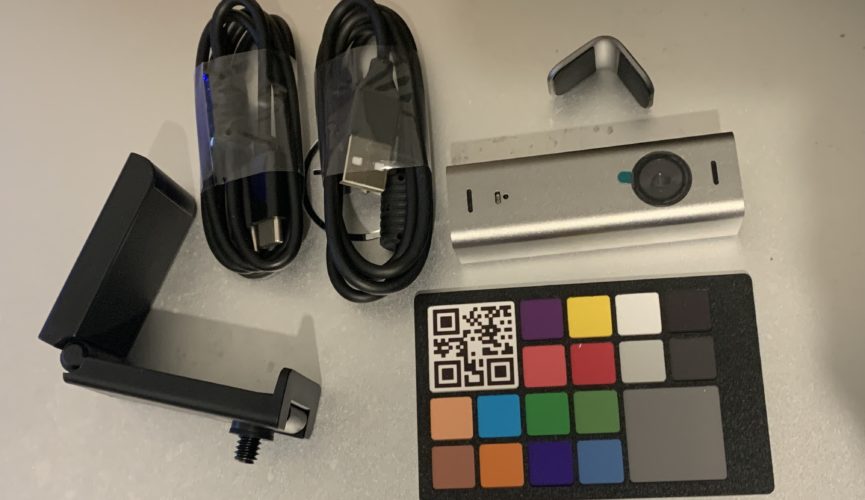
PerfectIt is a consistency checker. It isn’t a spelling or grammar checker. The following is taken from its own Getting Started guide:
PerfectIt checks:
Hyphenation consistency.
Capitalisation consistency.
Consistency of title case in headings.
Spelling variations.
Consistency of italics.
Numbers in sentences.
Punctuation and capitalisation consistency in lists and tables.
In addition, PerfectIt finds:
Abbreviations that have not been defined (or that appear before their definition).
Table titles presented in the wrong order.
Brackets and quotes left open
Subscript missing in chemical formulae.
Superscript missing in measurements.
PerfectIt also checks house styles. It can:
Check UK, US, Australian and Canadian spelling preferences.
Check UN, EU, WHO, GPO, Australian Government, and American Legal styles.
be customized to check your house style.
As an example of checking consistency, it presented “end user” and “end-user” as variations I had used. Some writers will need this type of check if they are not sure about using a phrase as a noun or as a modifier.
Detecting hyphenation opportunities
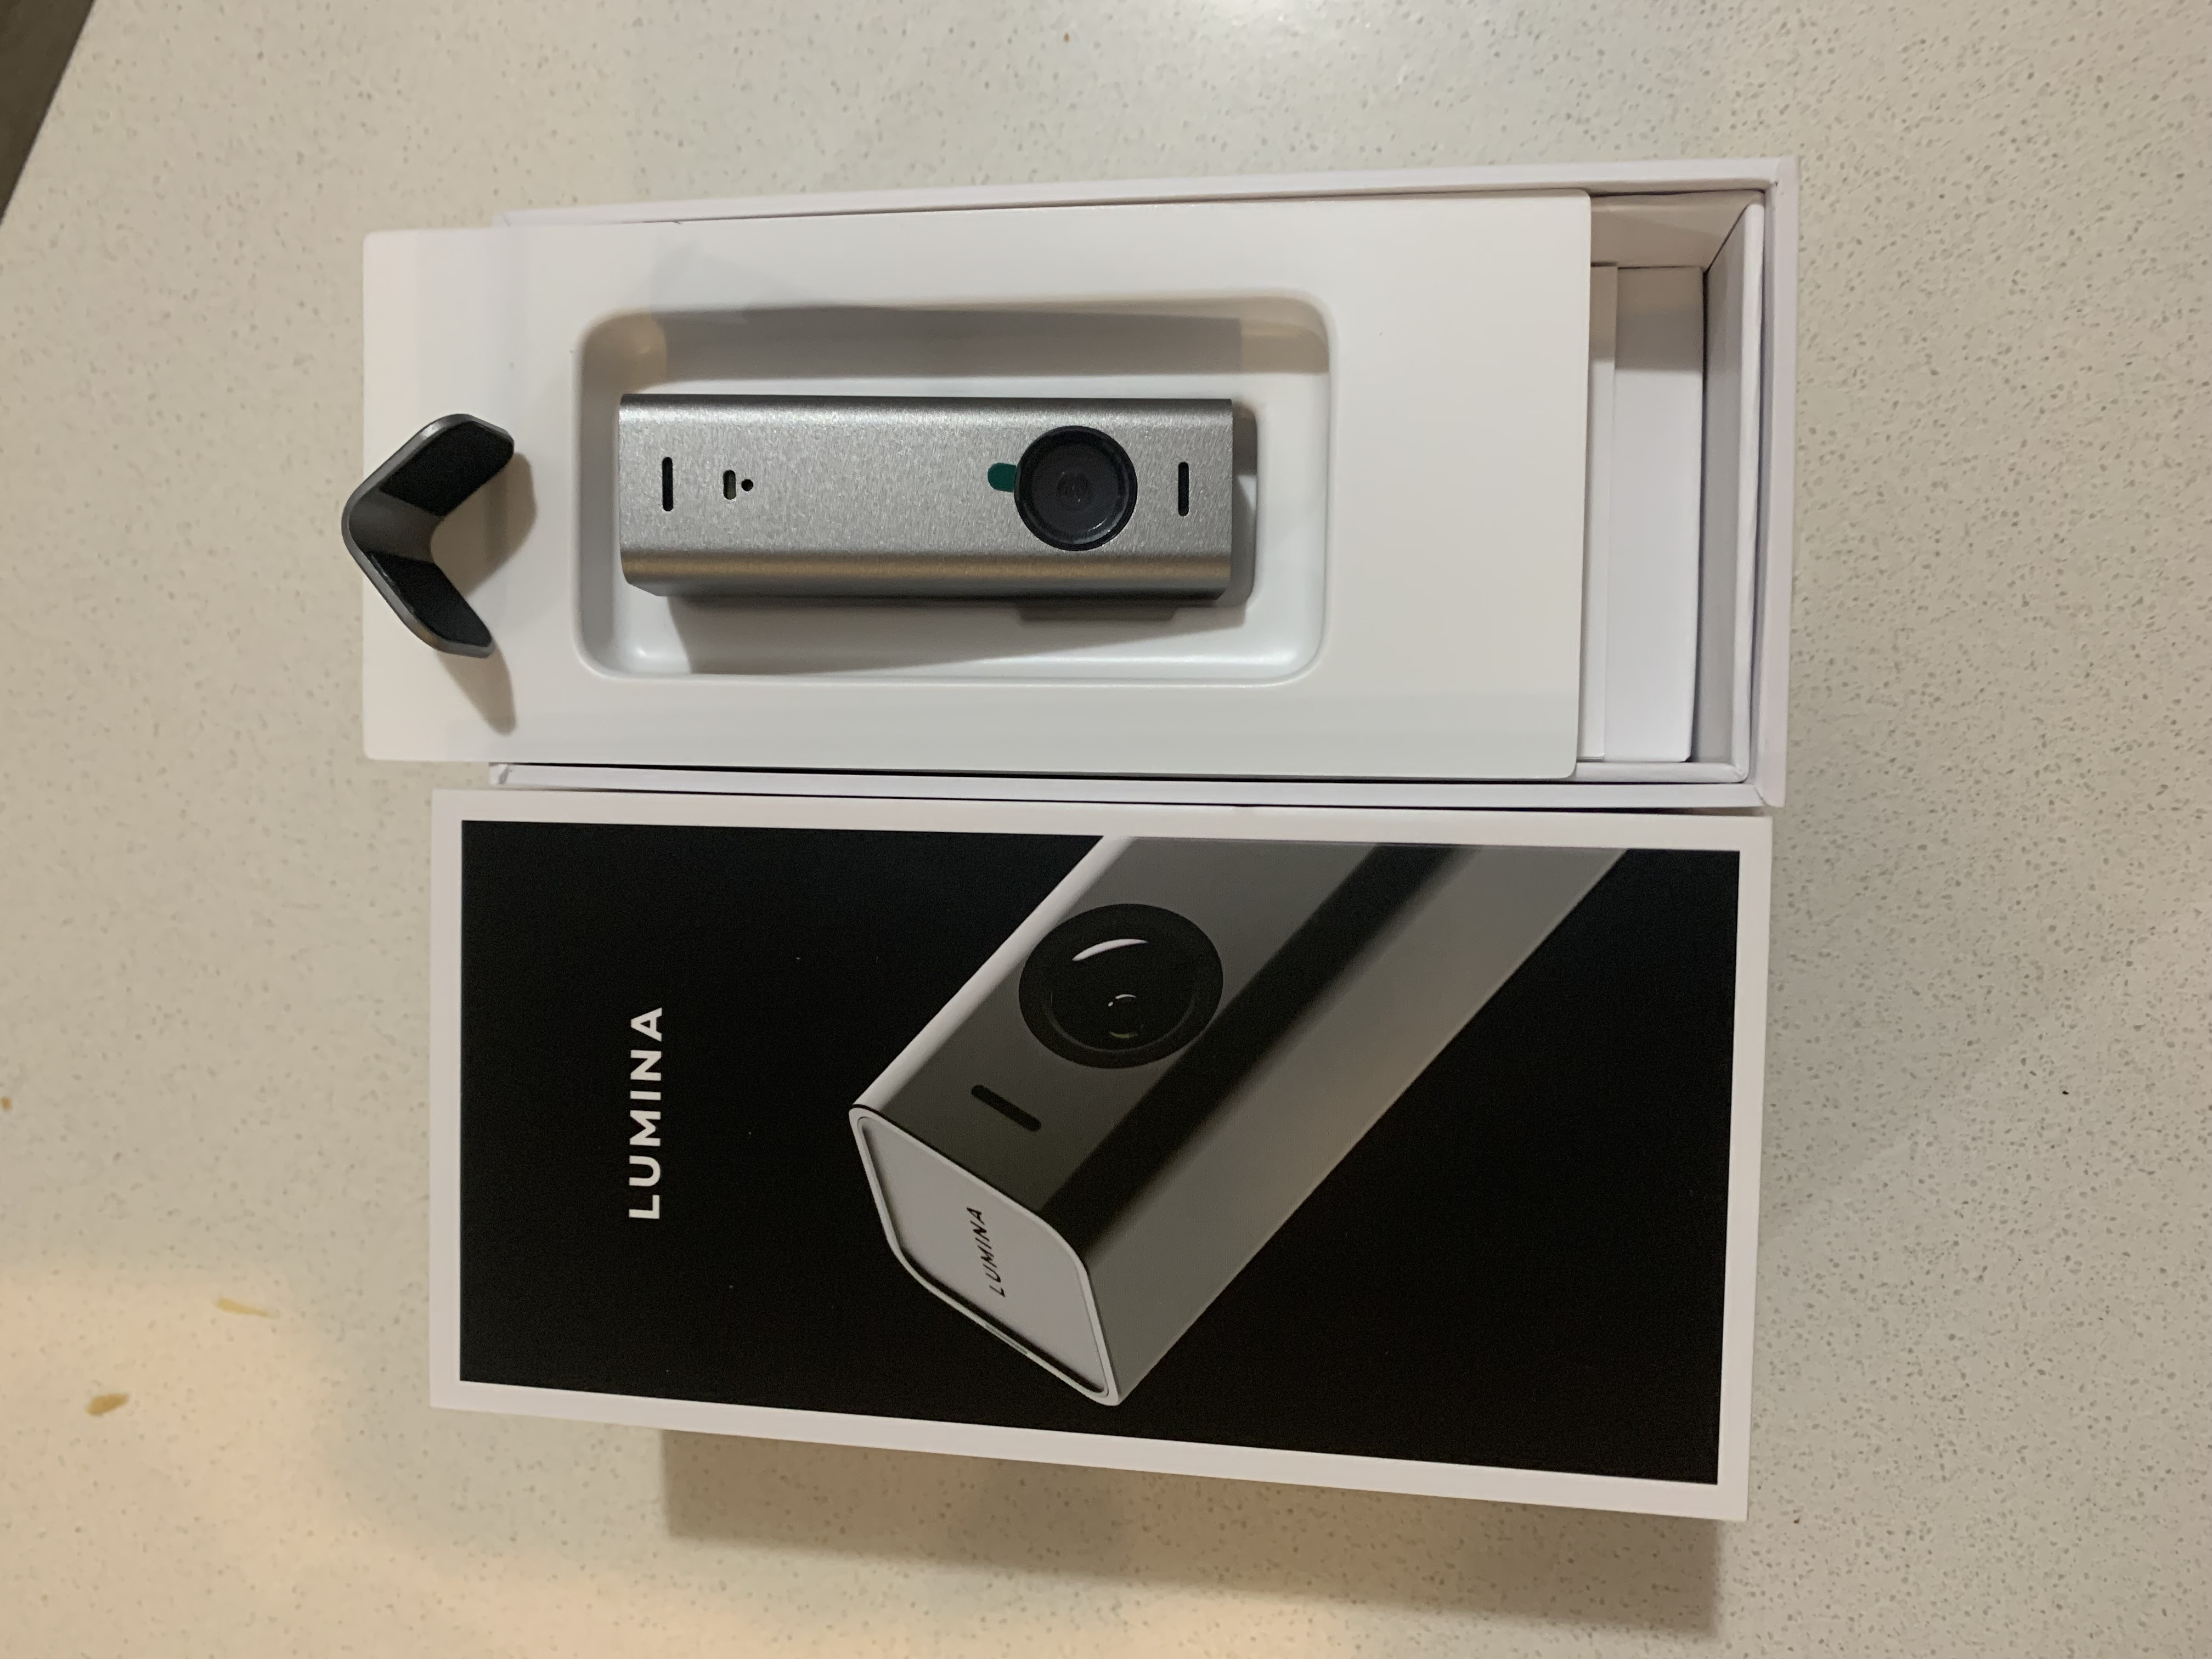
Towards the end of its numerous checks, it offered to tidy up the loose ends. For example, many of the edits needed the references to be updated.
Tidying up the manuscript.Summary Report.
For a small book of about 70 numbered pages (14,874 words), the process took me just over an hour. The other two books are 100 and 200 pages, respectively, so that will be fun.
Recommendation
PerfectIt requires a human to assess the recommendations, so I did not accept all of them. It did find a few omissions on my part, so I am happy with it.
I ordered the Lumina camera on 10 May and it arrived eight days later – an excellent turnaround. I had seen a friend share his Lumina Founders Edition webcam image and I was so impressed that I ordered one immediately.
Table of Contents
First Looks
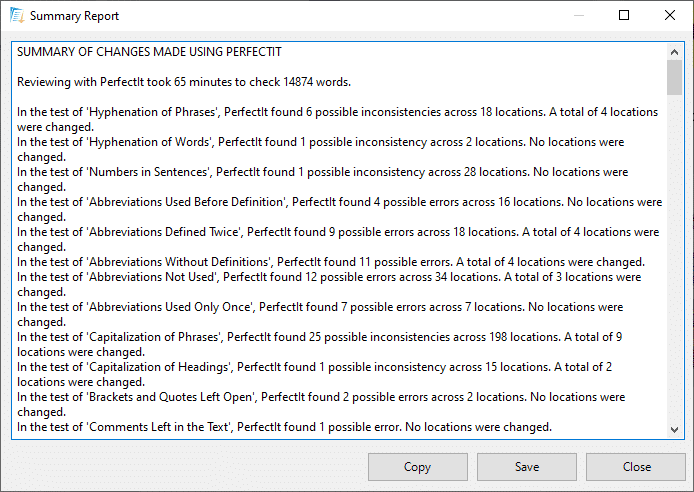
These are my initial comments, as I unboxed the camera less than an hour ago. The parcel was well packed and the camera box is well-made – not unlike an iPhone box.
Lumina packaging
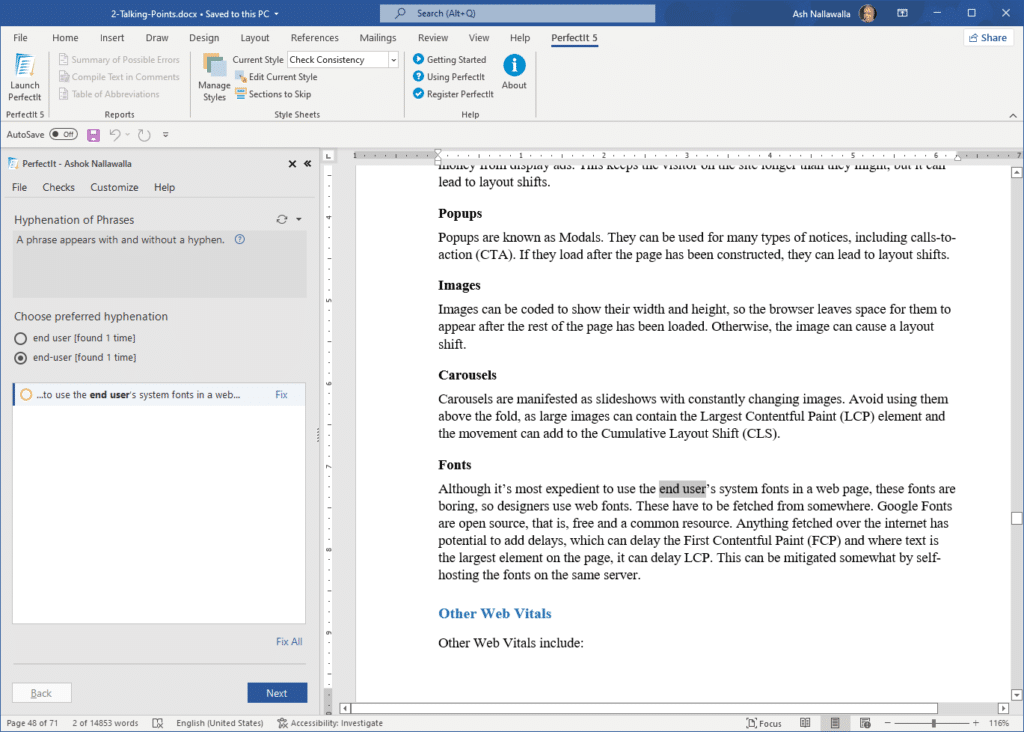
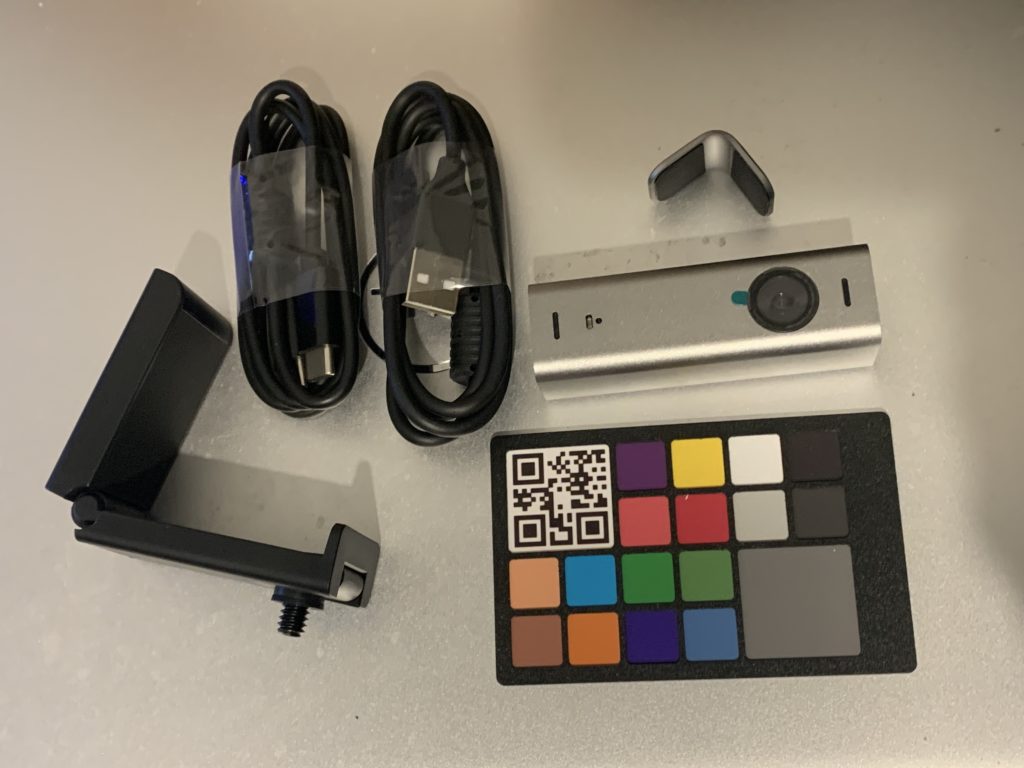
Contents of the Package
The camera comes with a magnetic cover to hide the camera when you don’t want the bad guys to monitor you secretly (if you believe in that), but the magnet is only above the lens. So you might bump it off by accident when the camera is exposed. You get two kinds of USB cables There is a folding mount that connects to your own tripod, or folds over your monitor or laptop screen. A supplied Allen key helps to tighten the camera on the mount.
Package contents.
Software
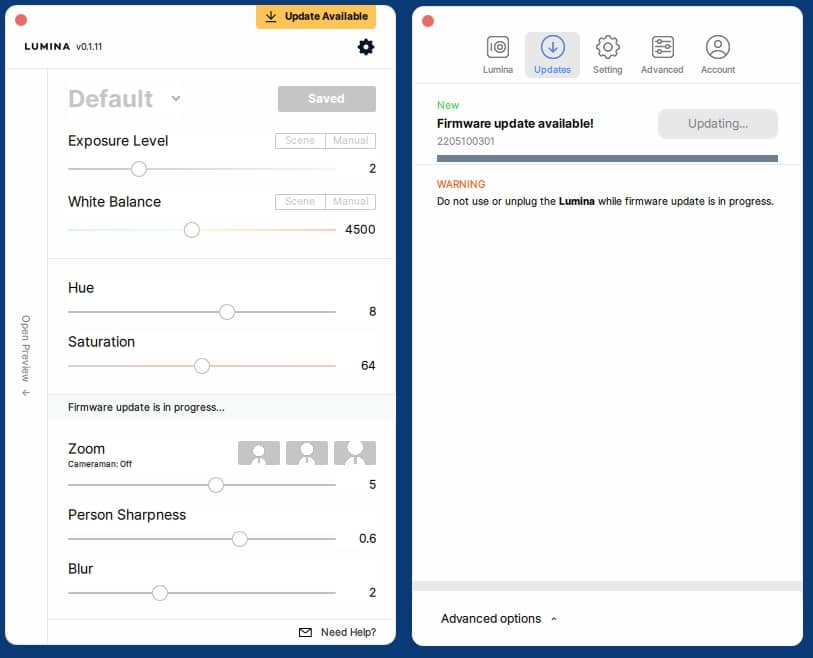
You need to download the Lumina software from their website, but before you do that, the camera must be connected to the computer so that its serial number can be supplied before the download. I installed it and there was also a firmware update I installed. All pretty straightforward.
Lumina software and firmware update.
Bugs
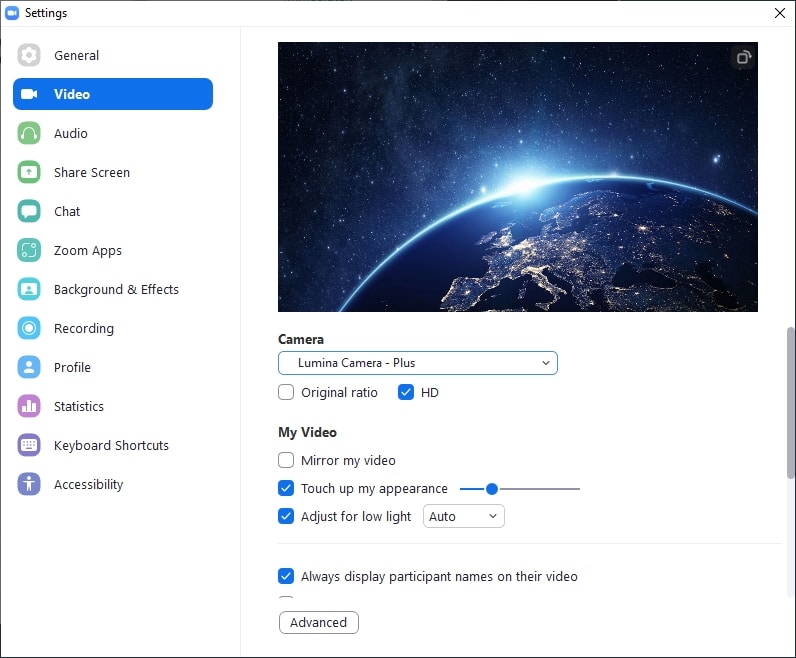
The colour tuning card you see in the photo could not be used immediately, as their website mentions some issues that are being ironed out. I used Zoom to test the camera and found that switching between the AI “Plus” mode and the Raw mode caused Zoom to not see my face until I restarted both the Lumina app and Zoom.
I became invisible in Zoom settings.
Comparison – Old and New
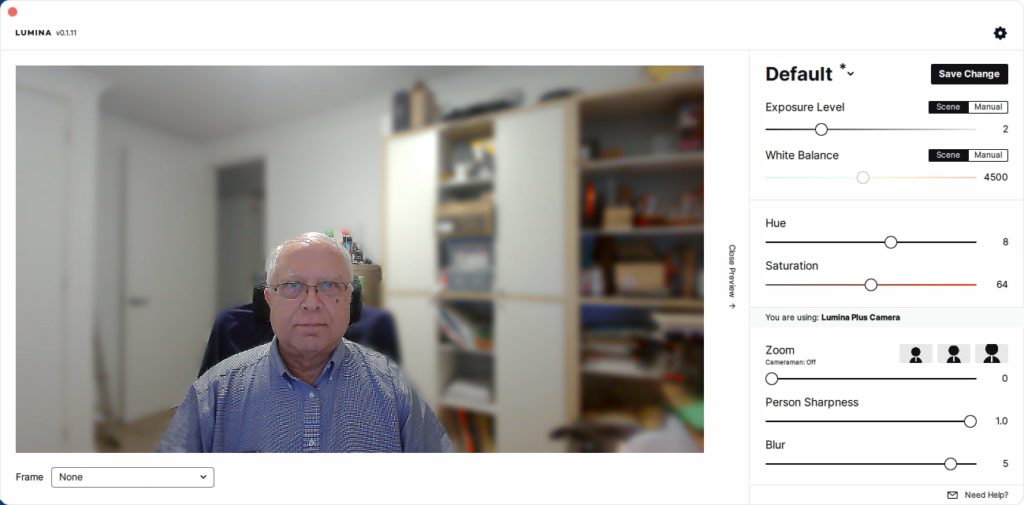
My old webcam is a 10-year-old RocketFish RF-HDWEB that had served me well for the occasional video call. Most of the old cameras don’t have zoom (the feature, not the app). I sit more than an arm’s length from it, so I look small compared to others who sit close to their laptop’s built-in camera. I will soon be publishing two SEO books, so I expect to be on camera a lot and needed this new camera. This odd comparison of old and new isn’t fair to the RocketFish, but it’s the kind of comparison that consumers will face, unless they are buying a new camera every other month.
My face with the old RocketFish HD camera.
The Lumina in Raw mode.
The Lumina in Plus (AI) mode.
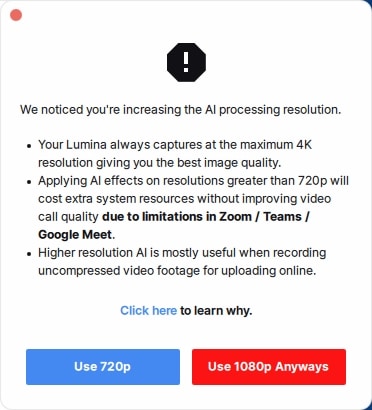
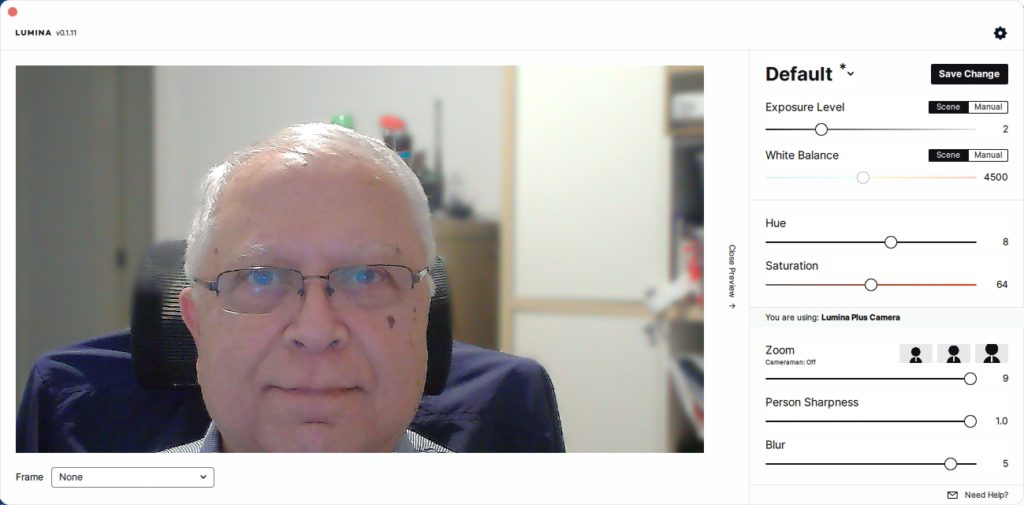
Checked shirts don’t suit video cameras, but I wasn’t changing clothes for this quick review. There was just one ceiling light and ambient light from the monitor in front of me. The Lumina is clearly better than the old one and the Plus mode is better than the Raw mode. I saw the warning about using 720p rather than 1080p, so I took the above screenshots in 720p mode. I did not test the AI mode, which adjusts the virtual “cameraman” if you are an animated kind of person who moves close to the camera and then moves back.
Warning about using AI at the higher resolution.
You can read more about the software at the Lumina website.
Zooming
Zooming (not the app) is done by having the Lumina app open along with your video app (Zoom in my case). A convenient slider lets you choose the level of zooming.
Maximum zoomed out (and background blur on).
Maximum zoomed in.
Verdict
Keeping in mind that I have used the Lumina camera for a few minutes, my initial impression is one of delight. Without adding any special lighting (which I will buy soon), my face is better lit than the old camera could achieve. More impressive for me is the ability to zoom in.
Lumina Website Link
Full disclosure: This link will take you to the Lumina website where you can read more about it. If you buy through this link, you will get $25 off and if two people buy a camera each, I will get a free one – I intend to gift it to a very deserving person whom I know.
I suffered a major setback by way of a book manuscript I was writing. It is lost beyond repair. I know what I should have done, but I am documenting this to help others. I use an offline copy of Word 2021, not the online Office 365.
Table of Contents
Possible Causes of Word Doc Corruption
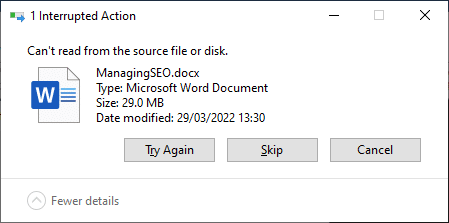
The book manuscript was about 283 pages from memory and I had not backed it up for over a month, and the backup copy was 30 pages shorter. I was finding that Word and Excel documents were taking longer than usual to open and I wondered if my hard drive was on its way out. I decided to back up the folder to my backup drive (a separate physical drive) and that was a clue that something was wrong, as the copy failed.
I used O&O Software Disk Defragmenter to defrag my data drive D but it was taking very long, so I thought I should stop it.
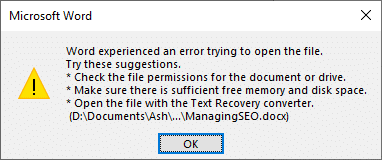
I tried to open the manuscript to add some content and found that it would not open. I had last used it last night, so I was puzzled. I remembered that I had done an online repair of Office and wondered if I had installed the 32-bit version of Office instead of the 64-bit version. I had an ISO of the original download, so I reinstalled Office, but it made no improvement. The Word doc refused to open.
The doc would not open.
Still no luck.
Things Tried on the File
chkdsk /f reported no errors.
chkdsk was happy with the drive.
chkdsk was still happy with the drive.
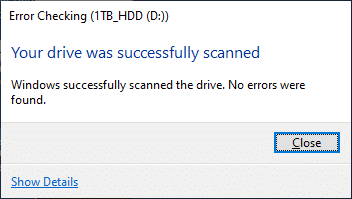
Error checking via File Manager > Properties showed no file errors. (image above)
Open and Repair did not work.
Text recovery tool did not recover any text.
Recover Text from Any File did not work.
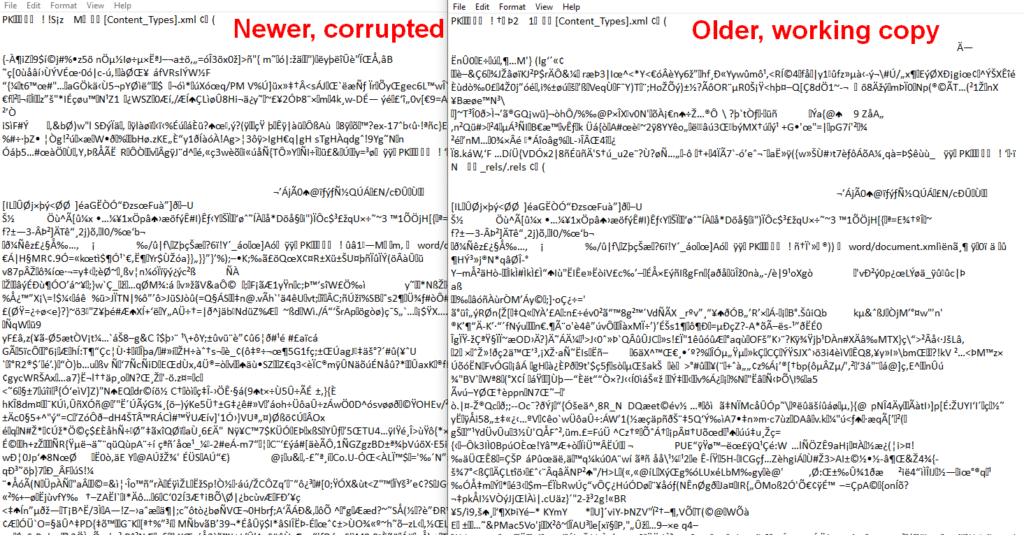
Opening in Notepad is a crazy suggestion, as seen in some articles. The contents are not plain text – other than some file names. See below the older, working copy and the corrupted file below.
Corrupt and clean versions viewed in Notepad.
There are no previous versions or unsaved versions.
Importing into Google Docs did not work.
Inserting into an empty document as an object did not work. “Word has encountered a problem.”
Trying to link the corrupt file to a clean doc did not work.
Tools Used
There are many articles with suggestions, but they are rehashes of the things I tried above and sometimes have affiliate links to tools.
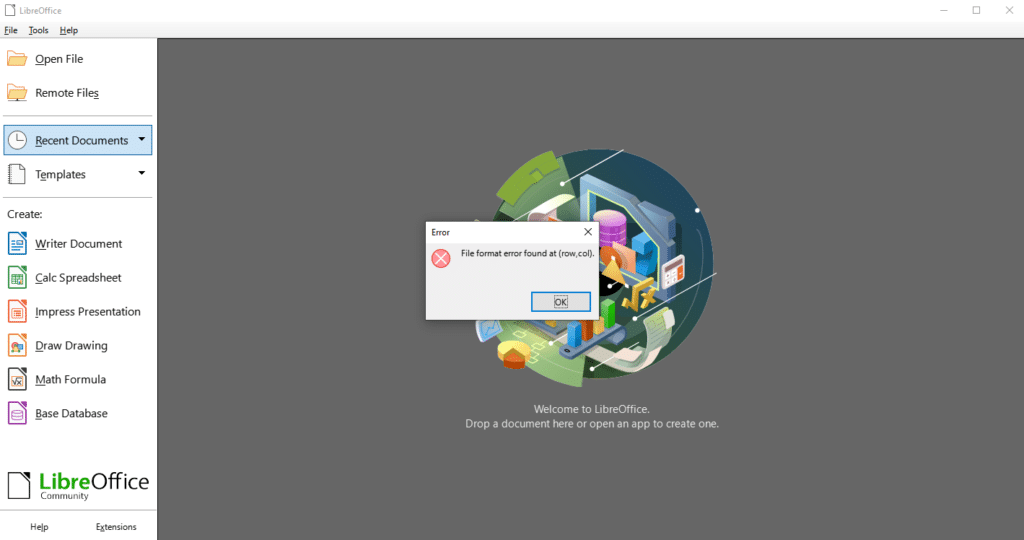
Libre Office could not open it.
LibreOffice could not open the corrupt file.
OpenOffice also failed to load it. Its help text says “The most recent versions of OpenOffice can load, but not save, the Microsoft Office Open XML document formats with the extensions docx, xlsx, and pptx.” Note: Both LibreOffice and OpenOffice did open the working copy – but not this corrupt copy.
OpenOffice failed.
Stellar Repair for Word crashed on the file.
Stellar Data Recovery was useful to undelete an earlier version, but 30 pages shorter.
GetData Word Repair couldn’t open it.
Remo Repair announced that it had recovered it, but the file vanished
At the moment I am stumped. The disk and data are fine. The file is difficult to select – clicking it sends File Explorer into a long delay before I can get control, but the file just does not open. Sending it to an online service times out for this reason and downloaded trial tools cannot process it.
If you have any suggestions and have personally solved this problem, please leave a comment. (Comments are moderated)
Update
I managed to open the copy with a paid version of the file recovery tool – Remo Repair Word – but it turned out to be an older version too. In the end, I used a recent PDF copy and exported it to RTF. This has some scrambled tables and some missing images, but it will get me back to sanity, with fewer than 10 lost pages. Many of the lost pages have images, which are safe, so the lost text won’t be too hard to re-create.
I administer an unlisted Facebook group known as “Bombay, I Remember”. It is a group for reminiscences of its members in the pre-1995 Bombay (when the city was renamed to Mumbai), but nowadays it is kept alive with a lot of historic content about Bombay. Several posts have covered the railway line of the former Bombay, Baroda and Central India (BB&CI) line, particularly the stations at the start of the line.
I have not found any old document that mentions this “Bombay Back Bay” station.
Table of Contents
The Bombay Builder
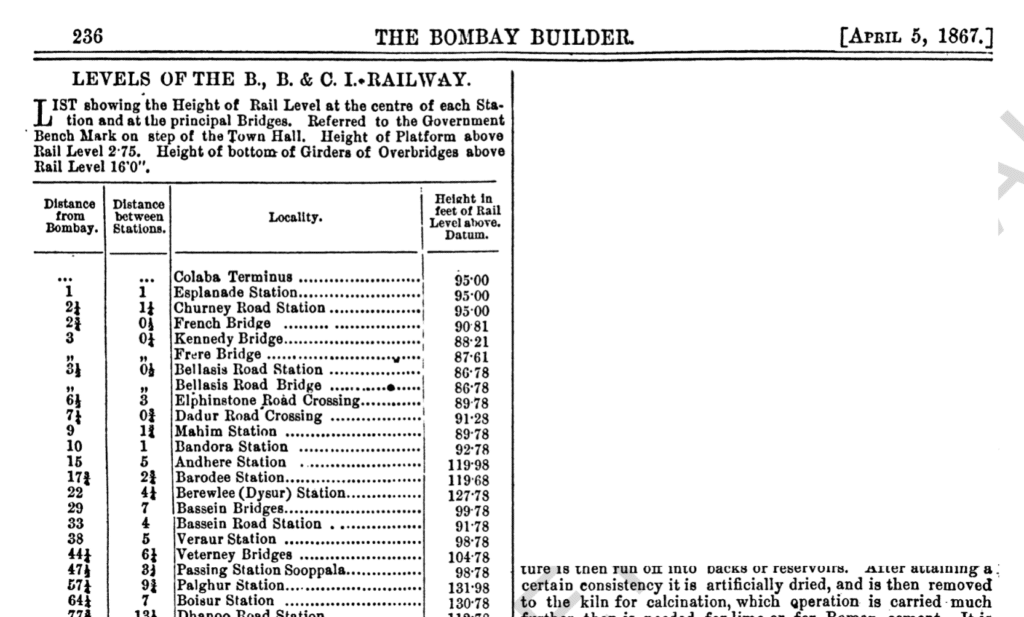
Today, I found an archive of the Bombay Builder covering 1867 at the Asiatic Library’s online archive known as Granth Sanjeevani. The specific page below is dated 5 April 1867. Note that date.
Note the stations in the Locality column.
Two things stood out for me. The terminus at Colaba was there in April 1867. The second station is called Esplanade Station. This is an added mystery, as the Esplanade in those days was too far from this train line to deserve the title. As this is a journal for engineers, they were interested in girders and overbridges, in addition to stations.
Western Railway
The Western Railway (WR) has been the name of the former BB&CI since 1951, so it should know its own history. Its website is very flaky, so here is a screenshot of its About Us > Milestones page.
WR milestones.
Notice that the WR timeline says the line to Colaba was extended in 1873. How can the earlier reference in the Bombay Builder mention a Colaba Terminus before 5 April 1867? The entry for 1867 mentions the start of a local service between Back Bay and Virar (then spelt Veraur) on 12 April 1867.
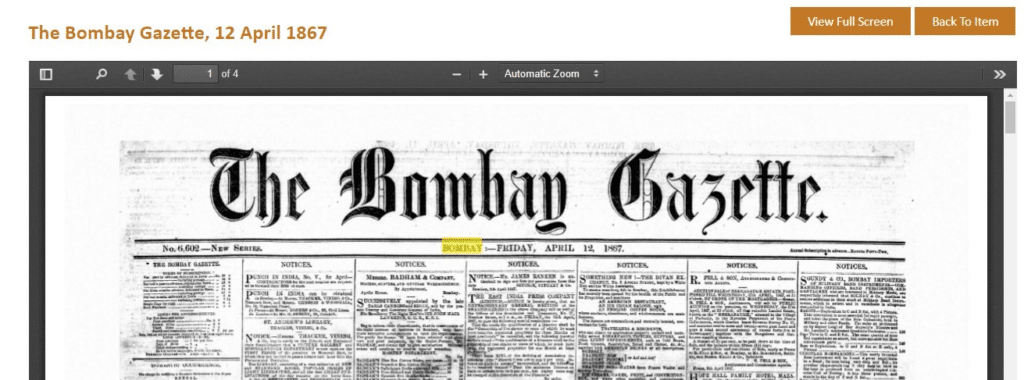
I decided to check the newspapers of the day, as scanned by Granth Sanjeevani.
The Bombay Gazette of 12 April 1867.
I checked the date of this new service, the next day and a few days on either side. Not a single mention. Surely a service covering the length of Bombay was worth a mention? BB&CI used to advertise almost daily, but no mention of a new service?
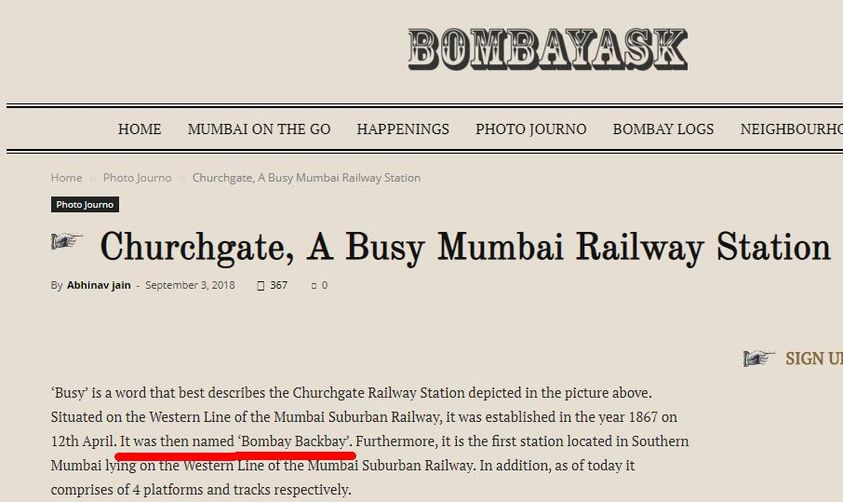
“By 1867, a track along the foreshore, further than Grant Road station was constructed, up to the station named as “Bombay Backbay” near Marine Lines. On 12 April 1867, the first suburban train was started with one train each way from Virar to Bombay Back Bay. The stations were then named, “Viraur, Neela, Bassein, Panje, Borewla, Pahadee, Andaru, Santa Cruz, Bandora, Mahim, Dadur, Grant Road and Bombay Backbay”. In year 1870, Churchgate was first time mentioned as the station. The line further extended towards Colaba in 1872, and goods shed was built there.”
The spellings in those days were quite fluid, so they are a little different from the ones in the Bombay Builder. The unknown Wikipedia contributor has a different date (1872) for the extension of the line to Colaba compared to the WR date of 1873. They mention this mythical “Backbay” (actually two words, Back Bay) station as being “near Marine Lines.
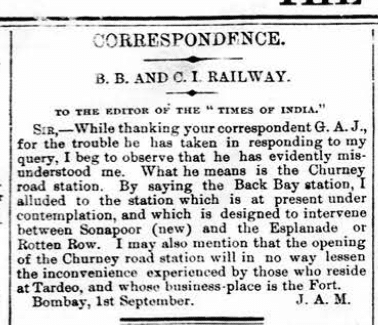
A letter to the editor
Letter to the Editor, The Times of India, 2 September 1868
Where does this leave me? I have not found any old document that mentions this Back Bay station. Until I do so, I will treat Back Bay Station as a colloquial reference to Church Gate Station (whose name slowly became one word). If you go to that Wikipedia page for Church Gate Station, you will see that it was opened in 1867!
Wikipedia entry for Church Gate station.
Here is another modern reference to Church Gate being called Back Bay.
Church Gate being called “Bombay Backbay”.
As for the other mystery of an Esplanade Station between Colaba Terminus and Churnee Road (now spelt Charni Road), I think it too is a colloquial reference. Perhaps the engineer who wrote that entry was a brief visitor and wrote it up when back in the UK?
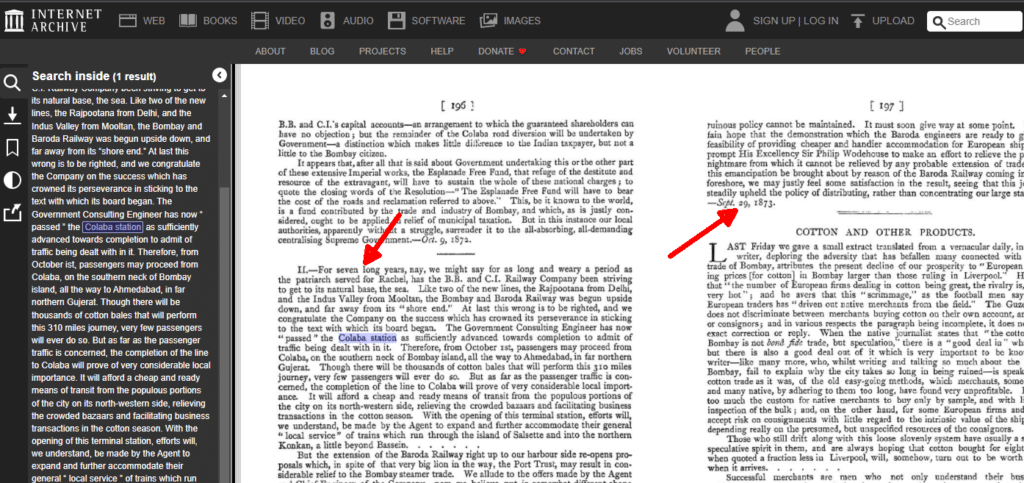
Colaba Station Dates
I found this document “Things of India Made Plain, or A Journalist’s Retrospect” by W Martin Wood in the more navigable archive – the Wayback Machine. It mentions in an entry dated 29 September 1873 that the Colaba station was well towards completion that year, after a period of seven years, suggesting that it was started in 1866.
Colaba station took 7 years to be built.
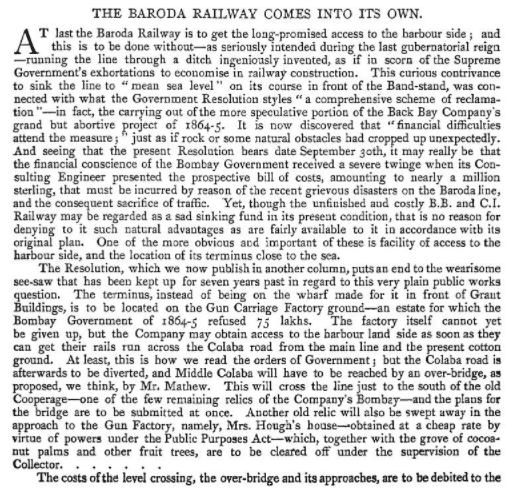
The previous page has an entry dated 9 October 1872, mentioning the procurement of the land for the station.
1872 entry.
Those words from 1872 suggest that there were railway tracks to Colaba in 1867 (also mentioned by the Bombay Builder), but the grand station was not completed until seven years later. Those tracks carried the cotton to the docks there during the US Civil War and to the Cotton Green. There is a plaque at Bombay Central station that acknowledges a Colaba Causeway station built in 1870 and another reference that the line used to go to Arthur Bunder.
I do a lot of historic research about my birth city, so I am often delving into old articles and images, sometimes needing to perform image searches but a right-click in the Google Chrome browser. Of late, I noted that this functionality had been replaced by Google Lens – a product whose purpose is unfathomable to many people, including myself. You do this fairly unproductive search in Lens and sometimes it senses your frustration and deigns to let you continue the search in Google Image Search.
The bothersome option in Chrome.
How to Disable Google Lens in Chrome
Open Google Chrome.
In the address bar, type “chrome://flags” and press Enter.
A long list of options is shown. Press Ctrl+F and search for “Lens”.
You are taken to the option “Search your screen with Google Lens”.
Change the setting from “Default” to “Disabled”. (You might hears wails coming from the ‘plex)
At the bottom of the Chrome screen, click “Relaunch”
You might want to try connecting your Windows PC with your Malahit DSP2 receiver using SDRUno-Extio (not the regular SDRUno, but the other one you will find that was installed at the same time) and Omni-Rig 1.9. Now why would you want to do this? One reason is that you are a geek like me and want to see if it works and is worth the trouble.
What You Need
In addition to the receiver, you need a USB cable, but as a geek you have already hooked that up to update your firmware. You need Omni-Rig 1.9 (other versions might work, but you need one that shows the TS-480.)
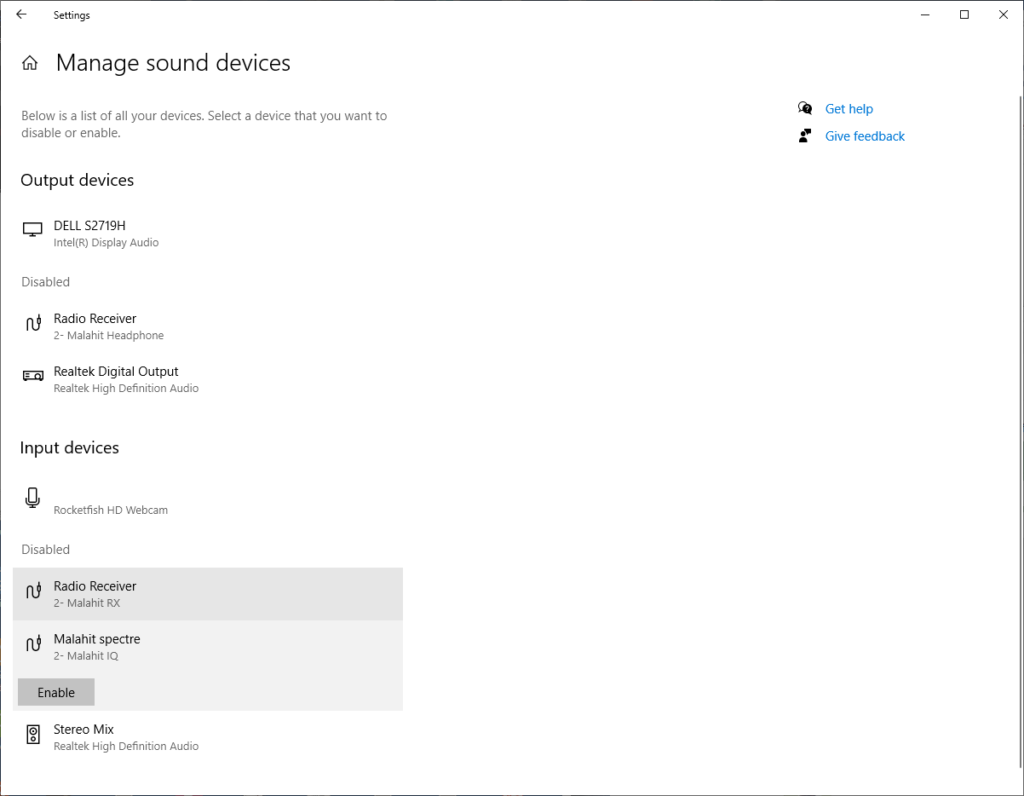
Manage Sound Settings
Once you have enabled the two disabled items above, you should see the “spectre” option in SDRUno-Extio, but after you have set up Omni-Rig correctly.
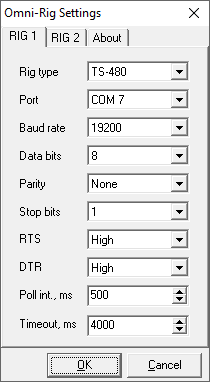
Omni-Rig settings
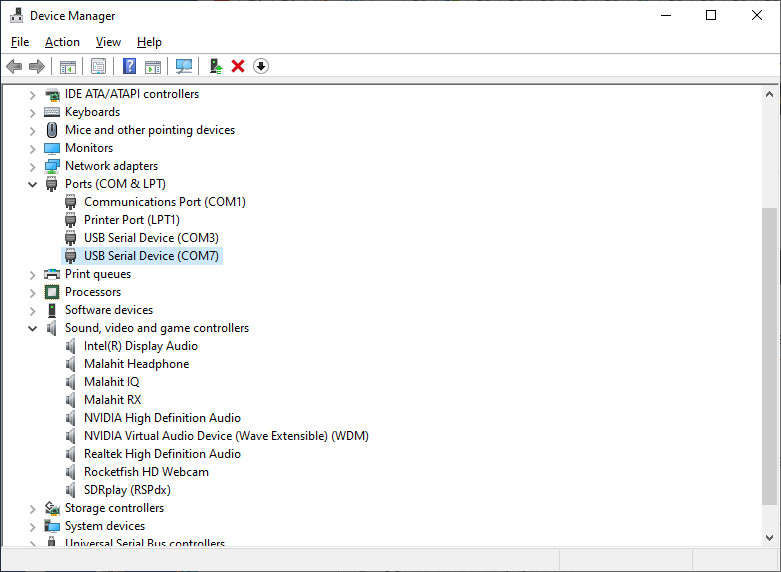
The Rig type should be TS-480 and the Port is the one you see in Control Panel Device Manager. When you unplug the receiver, a COM port will disappear and will return when you plug it in – that is your Malahit’s COM port – COM 7 in my case.
Find the COM port used by the Malahit.
The baud rate should be the same as the CAT settings in SDRUno (The Sett. button in the SDRUno Rx Control).
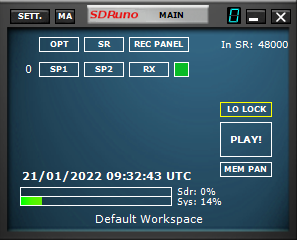
Start SDRUno-Extio. A tiny window opens up.
Start SDRUno-Extio
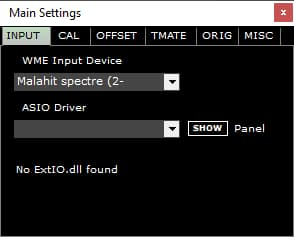
Click Sett. to open the main settings. Choose Malahit spectre as the WME Input Device.
Select Malahit spectre.
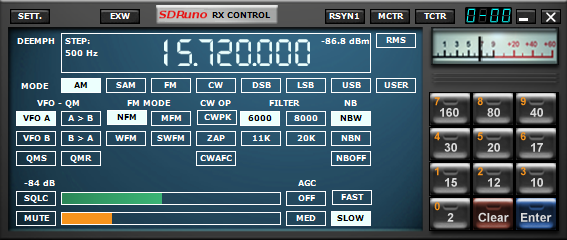
Click RX in the main window to open a receiver instance. Note the three buttons at the top: RSYN1, MCTR and TCTR. The labels are white text.
A receiver instance is opened.
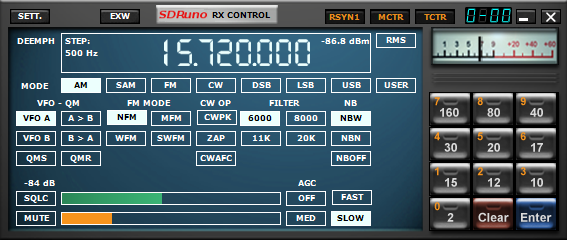
Click each of the three buttons: RSYN1, MCTR and TCTR. They will turn to orange text.
The three buttons are clicked.
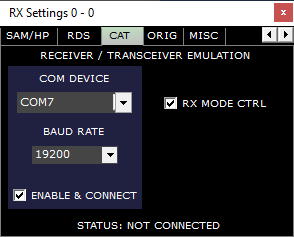
Click Sett. and go to the CAT tab. Choose the Malahit’s COM port and baud rate.
Set COM and Baud Rate.
I am not sure why the status says “Not connected” but once you click Play on the main window, the PC speaker should come to life and relay the Malahit’s audio and mirror the frequency in SDRUno.
Click SP1 in the main window to display the spectrum and waterfall in SDRUno-Extio.
Spectrum and Waterfall in SDRUno.
You can now control the receiver from your PC. Enjoy!
Thanks to Alexander DL5VZ for his help in clarifying these steps.
I had to make a 20-minute video in Descript and I jumped into it without reading any instructions, so flame away. I know I’m not the only one who uses such video tools, or any other software, before RTFM.
Table of Contents
The Split Word Problem
I can assure you that I do not have a long, Aussie drawl, but see the issue in the image below.
Words get split arbitrarily.
I noticed that some words were split into two clips for no obvious reason. I did not make a dramatic, extended “aaaaaaand” there. It’s a normal intonation. There was an “A ustralia” split too, when I do not utter a gap when I say it.
Another example of a split word.
For normal editing, such as the numerous full stops inserted in the middle of sentences, words shown twice, etc, you select multiple words and click the “Correct” button.
Example of a duplicated word.
The Fix
I have not found out what causes this glitch, but this is how I solved the problem.
Select the shorter fragment.
Delete it.
Click “Correct”.
Select the longer fragment.
Add the letters you deleted from the shorter fragment.